Since each Purchaser’s stub is a little different, this screen will allow you to customize each Purchaser. This is a crucial feature of the Check Stub System. This allows you to match the information provided on the stub to your data entry.
This screen is easiest to set up if you have the actual stub in front of you. Only include the lines that this purchaser uses. The Enter fields should match the information that is provided to you. For example, does the purchaser provide the 100% number or the Owner percentage? Enter what they give you and have the system calculate the other side.
NOTE: For the Stub Line items to populate in Purchaser Setup, a Default Purchaser (DEFAULT) must be set up in Sub-Account Maintenance (F12) under the Purchaser Sub-Table. The only fields that must be entered are the Sub-Account code and the name. This will be the only Purchaser you must set up manually under F12.
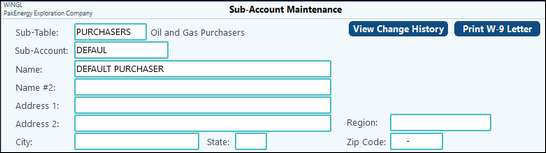
First, set up the Purchaser code and Name. When a Purchaser is set up in this menu item, the Sub-Account will also be created in F12.
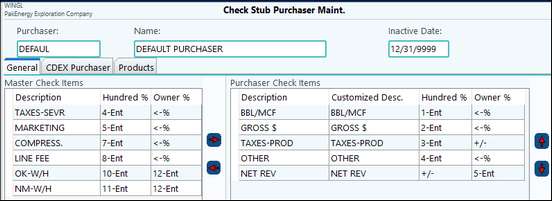
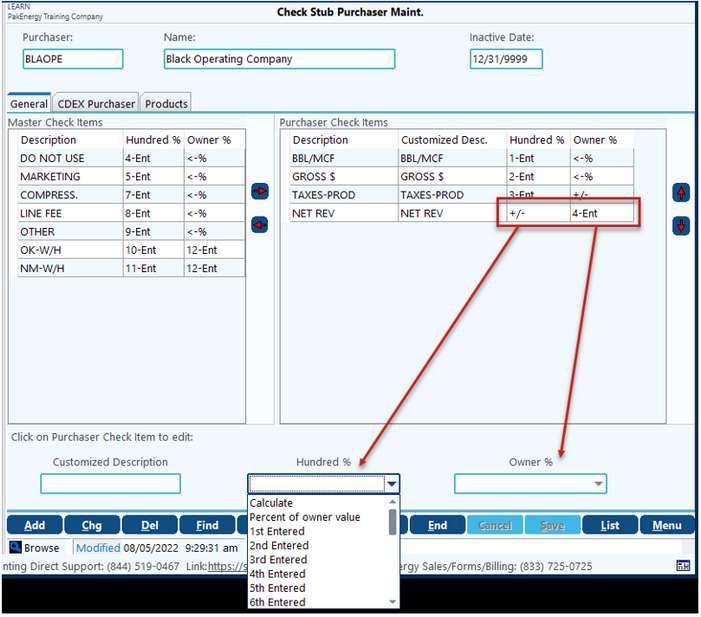
The Default Purchaser will appear on the screen with all of the stub line items that were entered in Check Stub Line Items Maintenance. Now additional purchasers can be added in Purchaser Maintenance. Purchasers cannot contain special characters or symbols. Click on each line you need and use the red arrow to move it over to the right-hand side of the screen. When done with the setup, the right-hand side will be the data entry screen during entry.
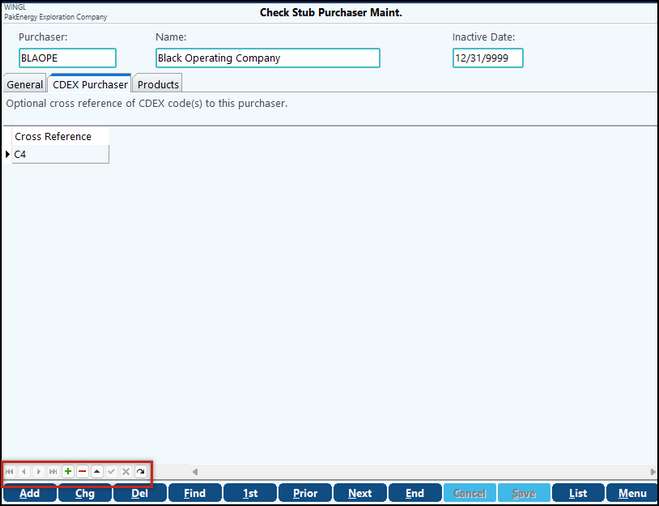
NOTE: If setting up CDEX, Pak Accounting recommends the purchaser be set up as a "normal" Sub-Account and then setup the CDEX purchaser code for the cross reference of that code. See: CDEX Purchaser Tab below.
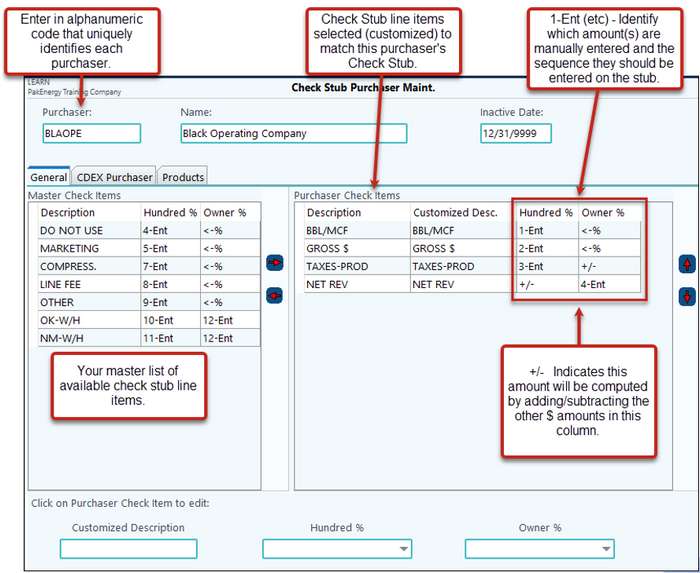
Now, once we have all the lines from your stub on the right-hand side of the screen, it’s time to set up the fields that will be manually keyed in versus the fields that the system will calculate for you.
You will want to make sure the stub lines are in the same order (top to bottom) that you will be keying in from your stub. If you need to change the order of the lines, use the Up/Down arrow buttons located on the right side of the screen to reposition the highlighted stub line to a different row.
Purchaser Check Items |
|
Description |
The description as setup in Stub Line Items Maintenance. |
Customized Desc. |
Defaults to Description field. However, this can be overridden using the Customized Description box in the lower left-hand corner of the screen. |
Hundred% |
The 8/8th amounts on the Stub |
Owner% |
Your company’s portion on the Stub |
Amount Fields |
|
1-ENT (2-ENT, ect) |
An ENT field is the actual field that will be keyed in. 1-Ent will be the first amount keyed, 2-ENT will be entered next, 3-ENT would be entered next…and so on. If any changes need to be made to the Hun% or the Own% column detail for this purchaser, click on the appropriate item on the right side and adjust the drop-down boxes at the bottom (see screen print). NOTE: The Owner % column / Net Rev Row should ALWAYS be an ENT field since this is the field that ties to your check. |
Percent of Owner or Hundred value (% ->) or (<-%) |
This will use the percentage from the Division Order and auto-calculate the amount from the ENT field across from it. |
Computation (+/-) |
There needs to be one of these in each column. This field will populate based on column calculations. If there are any rounding or out of balance amounts, the system will put them into this field. For that reason, this must be in a dollar field (not a quantity field) and should NEVER be in the OWN% column / Net row. |
CDEX Purchaser Tab
This tab is used to cross reference a current Purchaser setup to your CDEX Purchaser Code. This allows you to keep all your existing Division Orders and Check Stub history. There is no need to setup new Division Orders for the CDEX Purchaser. When using the Cross Reference CDEX Purchaser, it will look at the current Division Orders. To utilize this feature you must have the Default CDEX Purchaser setup.
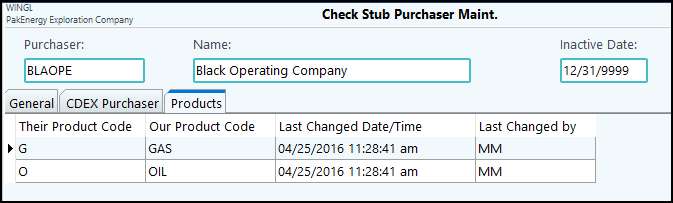
Add all products used by the Purchaser to the Products Tab. The Purchaser can have an unlimited amount of products referenced back to "Our Products." See screen shot above.