When the cycle is ready (all errors cleared, etc), select the next menu option to print the payroll checks. The box in the middle of this screen will tell you how many checks and ACH Direct Deposit stubs will be printed.
1.Make sure the First Check Number matches the checks actually being loaded into the printer.
•Remember, starting check number is determined by the highest check number on the bank reconciliation file for the bank code. This should automatically increment properly any time you print checks.
oSee Help FAQ – A/P FAQ – Checks/Payments - How to adjust check number for information on what to do if the default is incorrect.
•If the First Check Number is correct, select OK-Print to begin printing the payroll checks. A box will appear to allow you to print One Check at a time or All Checks in current payroll cycle.
2.Review the check totals to make sure you have the correct number of Checks and ACH files.
•When the checks have finished printing, the bottom of the screen will present Start Over, Change and Menu. If all checks that have printed are correct, choose Menu to return to the menu. If there was a problem, select Change to change the check number, then Start Over to restart printing.
3.Zero Amt will print the stubs for the employees receiving ACH but are not setup for e-mail.
•If you use the ACH/Direct Deposit features of Payroll, the Zero Amt button allows you to print a "dummy" check on plain paper to give to employees. NOTE: ***If you are going to submit CCD type transactions, please notify your bank in order for them to prepare to receive these transactions.***
4.Ok-Print will print out the employee checks.
•Once printed, this will change to Start Over.
•Just like the Start Over option in Accounts Payable, this will allow you to restart your check run in the middle if there is an issue. This is helpful if there is a paper jam or such.
5.Change will allow you to change the First Check Number field.
6.Menu will close out of the screen.
7.View All Check Stubs will allow you to view stubs, including the ones that were emailed to the employees.
NOTES:
•After you exit the Print Payroll Checks screen, if you need to reprint payroll checks you have additional fields for selection. First Employee number allows you to enter which employee to start the reprint. You have the option of Deleting the original check numbers and reusing them, or Voiding them in the system and using new check numbers.
•If you have added new employees to pay summary after you have already printed checks, you can mark the "Only include Employees with Blank Check Numbers" box and the system will only print a check for the employees without check numbers.
Tech Tip: For any Pak Accounting check writing system (Payroll , A/P, Revenue), the starting check number is determined by the highest number on the bank reconciliation file for the bank code. This should automatically increment properly any time you print checks. This is why it's a bad idea to have "dummy" check numbers (i.e. 999999) in your bank reconciliation file. If the "dummy" number is always the highest number on file, your check-writing systems will not be able to determine the correct beginning check number.
When choosing to print payroll checks remotely for certain departments, a series of options will need to be selected first which will allow you to do so. Please follow the steps below:
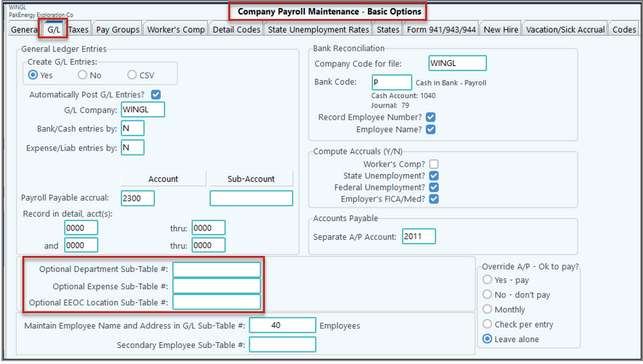
First, the Optional Department Sub-Table # has to be populated. Go to the Master File Maintenance - Basic Options screen and click on the G/L tab to populate the Optional Fields towards the bottom of the screen.
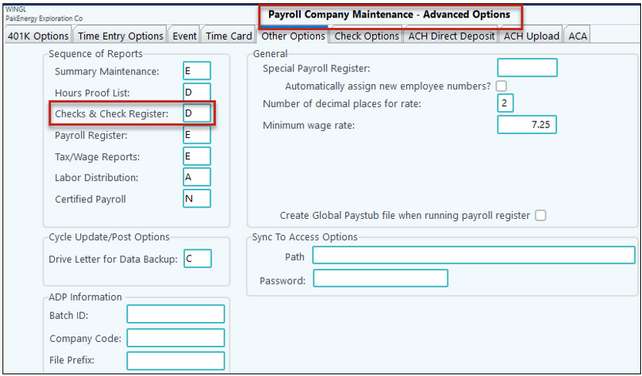
The Checks & Check Register indicator also need to be set to Department order. On the next screen Advanced Options (#81), click on the Other Options tab and set the Checks & Check Register indicator to a "D".
Doing so will turn on the Department box needed under Print Payroll Checks.
Note: Once checks for a specific department have been printed, you will need to close out before printing another department. |
Next Step: Print Payroll Register


