Pak Accounting's add-on Sub Assembly feature enables companies which manufacture a product made up of several inventoried parts to have the ability to create a master part with a sub assembly attachment. Service-oriented companies can also use this feature to invoice the customer for several types of charges involved in providing a service. Once the parts have been assembled, you will only enter one part number on the invoice. The system will list all the parts and associated charges that comprise the master part. You can override any of the sub-parts, quantities, or prices when entering them in the invoice input screen.
The product or the service billed to the customer is the Master Part. All items going into the Master Part (or service) are the sub assembly parts. Depending how each part is set up, you can adjust descriptions, quantities, and/or prices for each component when entering the invoice.
An example of Master and Sub-Assembly part is a computer system, assembled from inventoried components such as the case, disk drive, keyboard, monitor, and labor. The Master Part is the whole computer, the finished product. All the elements included are the sub assembly parts.
To Setup
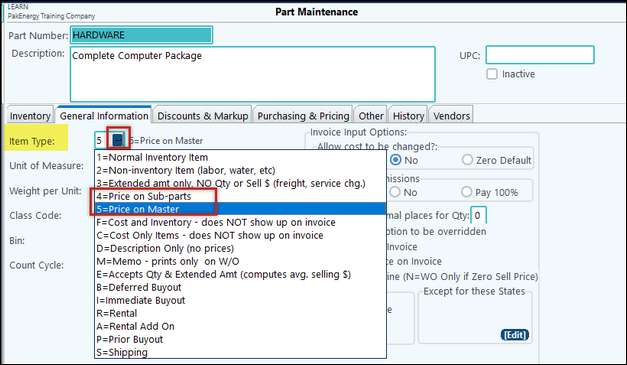
| 1. | Set up the Master Part in Parts Maintenance. In order to define the Item type for the part, you will need to determine at what level the price will be. General Information tab > Item Type > use the drop-down menu. |
•#5 - Price on Master: The sales price will print on the line for the Master Part only
•#4 - Price on Sub-parts: A sales price will print on the line of each sub assembly part and not on the Master Part
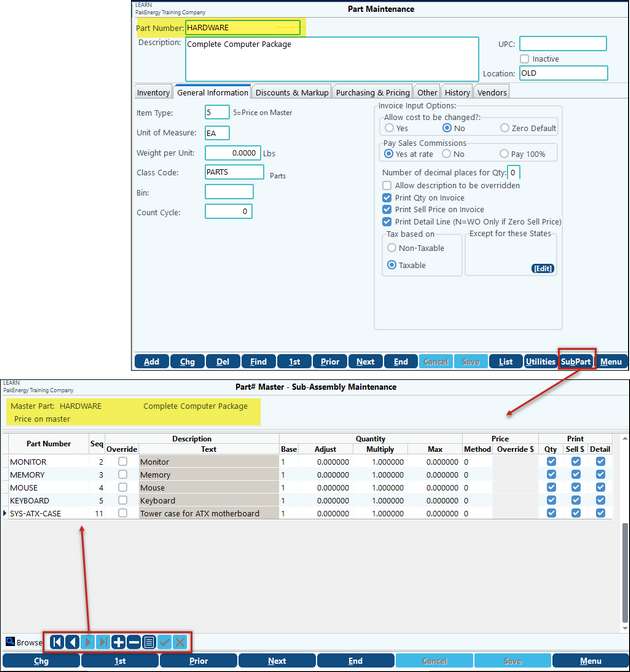
2. Set up the Sub-Parts in Parts Maintenance, for each item that makes up the product or service. Note: sub-parts are set to their regular Item type (i.e. Normal Inventory item, etc). Do not use types 4 or 5 for sub-parts, only on the Master Part.
| 3. | Find the Master Part in the Parts Maintenance screen, select the "SubPart" option in the bottom right-hand corner of the screen., this is where you will define each component that makes up the master part. When you specify part type 4 or 5, the “SubPart” option will appear at the bottom of the screen. |
To Use:
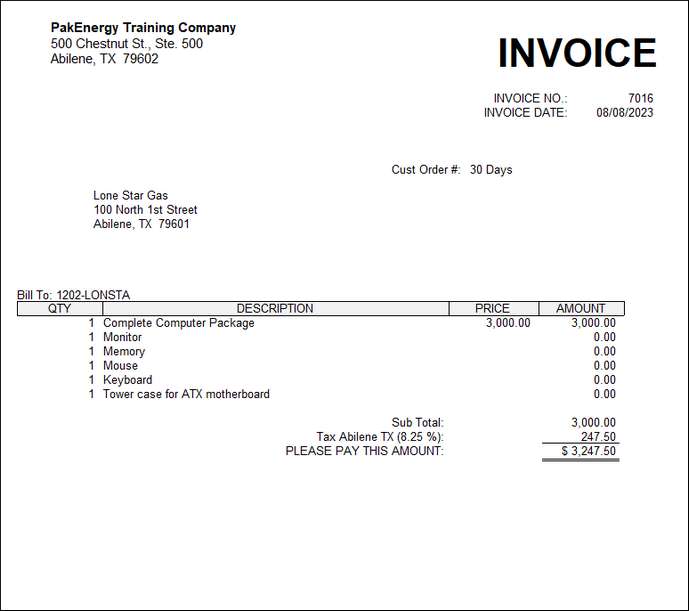
When a customer purchases the Computer (From above example), the screen will look like this:
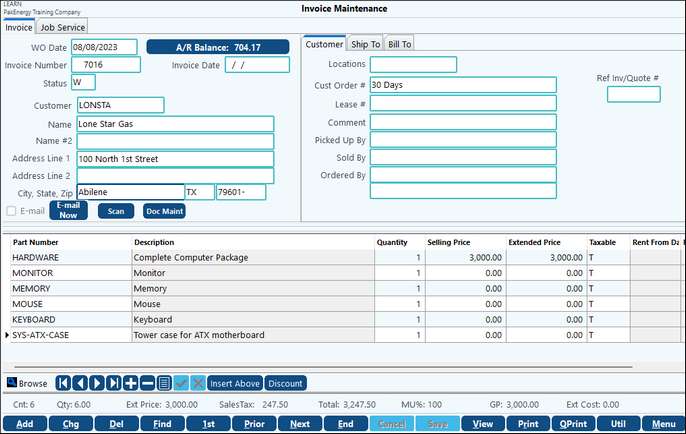
Since the master part was defined as Item Type 5, the price displays on the Master Part line instead of each individual part. However, it will list each individual part on the Enter Invoice screen in order to remove quantities from Inventory properly.
And, the Invoice will only show the Master part.