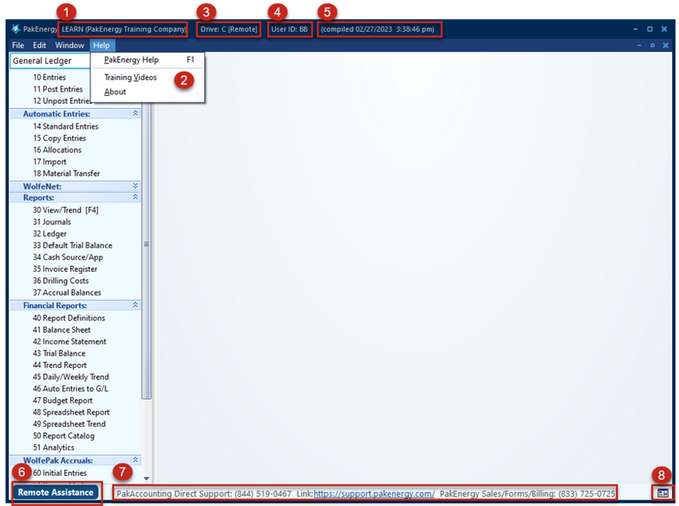
1.Name and code of the company you are currently working in. 2.Help includes three options: Help docs, Training Videos, and About - information concerning your software license and where Pak Accounting is loaded. 3.The Drive letter that Pak Accounting is mapped to the server. 4.The User ID are the initials of the person who is currently logged into Pak Accounting. 5.The compiled date is the date the executable file has been released. 6.The Remote Assistance button is an old method of allowing support to remote in. This is no longer available. When on the phone with support, they will use remote.pakenergy.com and give you the information needed to remote in. 7.Contact information for your Customer Success team and the Forms department. 8.Screenshot tool is available on all screens. |
Module Navigation
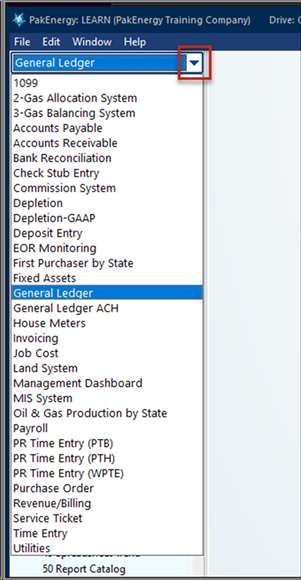
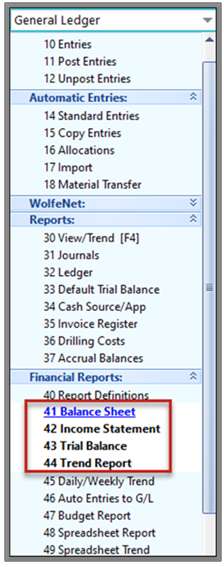
By default, you will be in General Ledger when you first log into the system. Use the drop-down arrow by the Module name to get a list of other modules. Click on the appropriate module to access it. The menu tree underneath the module name will show all the available menus for that module.
Hot Keys
Hot Keys work anywhere throughout Pak Accounting but are specific to the General Ledger. |
|
F1 |
Pak Accounting Help |
F4 |
View/Trend |
F5 |
Expanded Description |
F8 |
Switch to a Different Company |
F9 |
Pop-up Calculator |
F10 |
Save Screen Changes and Return |
F11 |
Account Maintenance |
F12 |
Sub-Account Maintenance |
/? |
Lookup – this key will also open the pop-up calculator while in an amount field; you can then populate the input field with the calculations using F10. |
Alt X |
Exit Pak Accounting from anywhere |
Menu Bar: (located on the bottom of Maintenance screens)
![]()
Navigate to a different record (Display a different record): Records are displayed in a “key” sequence. For example, the Chart of Accounts is displayed in the Account # sequence. All of the following are based on the “key” sequence, not the sequence the accounts are entered in.
Find - A prompt appears for you to key in or look up [/?] the information for the record you need. The system will display the closest record to the information you keyed in if an exact match isn't found. In cases where multiple records have similar information, use the “And/Or” option to allow for a narrower search. The Find is usually asking for a master file value. Pressing the [/?] key while in a master key field will invoke a lookup selection.
1st / End - Display the first record or the last record in sequence.
Next/Prior – Display the record before (Prior) or after (Next) the one currently being viewed.
Add – This allows you to start adding a new record. Most of the time, it will replicate part of the previous entry.
Change/Delete: affects the record currently being displayed.
Chg – (Change) - Locks the record to prevent anyone else from changing it and allows you to start making changes. You can also click into a field/option on the screen to start a change of the record being displayed.
Del - Deletes the record being displayed. A confirmation pop-up will ask if you are sure. Once deleted, the record is permanently gone. If posted detail exists, you will not be able to delete it.
Cancel/Save: Finalizes the action.
Cancel – causes the information that you entered to NOT be saved. Any information you keyed in gets discarded, and the system restores the screen back to how it appeared before the action was started.
Save – or [F10] - Saves the changes made to the record.
Menu – Exits and closes the screen.
Using the Find, Lookup (/?), and Contains fields together
As previously mentioned, on most screens, there is a find button in the bottom menu bar. Clicking this will bring up a window asking what you are looking for. The fields on this window will differ depending on the menu screen (for example, Account Maintenance or Sub-Account Maintenance).
In this window, if you click into a field, a box with dots will appear:![]()
While in this field, use your lookup button (the /? key on your keyboard) to access the Lookup Window or click on it with your mouse. By default, the cursor will start in the “Go To Account” field at the top. Using this field to search will only look in the Account column. Instead, tab down to the Contains field.
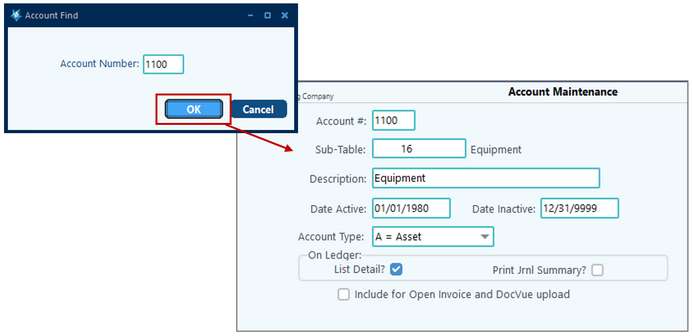
In my example below, I’m in Account Maintenance (F11) looking for an account. I will click on Find to bring up the search box, then the Lookup button to bring up the Account Lookup box.

By tabbing down to the Contains field, I can enter a keyword to help me search for a specific account. This search will look in all visible columns. For example, if I wanted to find all accounts with the word “equipment” in it:
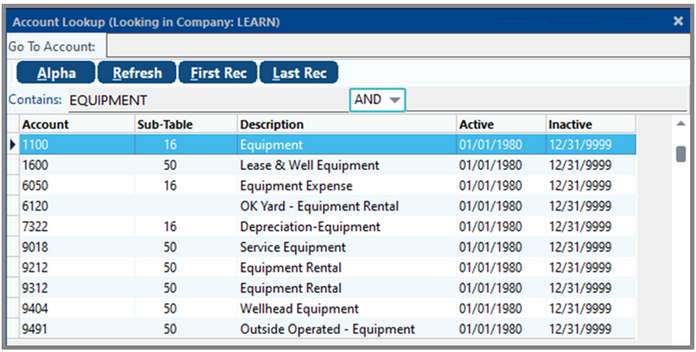
I can use the Tab or Enter buttons to get to the account listing and then use the up/down arrow keys to navigate to the needed item. Once it’s highlighted in blue, click on Enter to select it – or – you can use your mouse to click on it. This will populate the Find window. Click OK to complete the search and bring up the account.
Best Practice – It is best practice to click on the “Menu” button when you finish working on a particular menu item. This closes out the screen and frees up the memory resources the screen is using in your computer as well as the various data tables it has open. It leaves the screen area to the right of the menu blank, ready for the next task.
When you click on an option from the menu, the item will turn blue, indicating that you have that screen open.
If you click and open several different menu items without closing them (i.e., “Menu”), it can help you rapidly switch between two or more different items. However, PakEnergy Accounting doesn’t recommend this in all situations since making changes on one open screen may not be pulled into another open screen.
Keyboard vs. Mouse navigation…
Understanding the two different ways to accomplish data entry in the system is important. There is the FAST way vs. the SLOW way; the fastest way is keyboard entry, and the slow way is navigating with your mouse. Most “common” input routines in the system have been optimized for keyboard entry, avoiding the repetitive motion of having to move your hand over to the mouse to move the cursor. In addition, most modules (systems) are developed with the idea that each module's most intensive data entry section is usually the very first item on the menu.
Example: say you’re going into the system to key an Accounts Payable (AP) invoice. After you log in to PakEnergy Accounting with your user id & password, you will be at the General Ledger main menu. If you want to go to Accounts Payable, don’t touch that mouse!! Using your keyboard, press the [/?] button to the left of your shift key on the right of your keyboard. This activates the main menu of the system. Type the letter “A” and it will automatically select “Accounts Payable” on the menu, hit the “enter” key, and you are in the Accounts Payable menu in just 3 keystrokes!
Now that you are in the Accounts Payable menu and ready to key an invoice, don’t touch that mouse! “Enter” once, and it will move the menu item to “Enter Invoices to Pay”, then “enter” again, and you will be in invoice entry, ready to key an invoice. “Enter” one more time, and you are automatically adding an invoice entry. So, with 6 quick and easy keystrokes after you entered the system, you are now adding an invoice entry, and you never touched your mouse!
Continue the A/P invoice entry without touching your mouse; the entry should flow from field to field automatically. After you’ve finished entering your detailed accounting coding line items at the bottom of the invoice, hit F10 to save the screen; you do not have to grab the mouse to click on “Save”. Hit “enter” again, and you are back, entering another invoice with NO mouse usage at all!
Print and use the Hot Key handout regarding the most common shortcuts.
Also see Hot Keys