The account option is a way to only include specific accounts and all the Sub-Accounts for that account when printing financial group/cost center level financial statements.
Example: A Balance Sheet is needed for each partnership. How is this accomplished in Pak Accounting?
Each partnership has an Accounts Receivable (A/R) account set up. All other accounts to be printed have the partnership code as the Sub-Account.
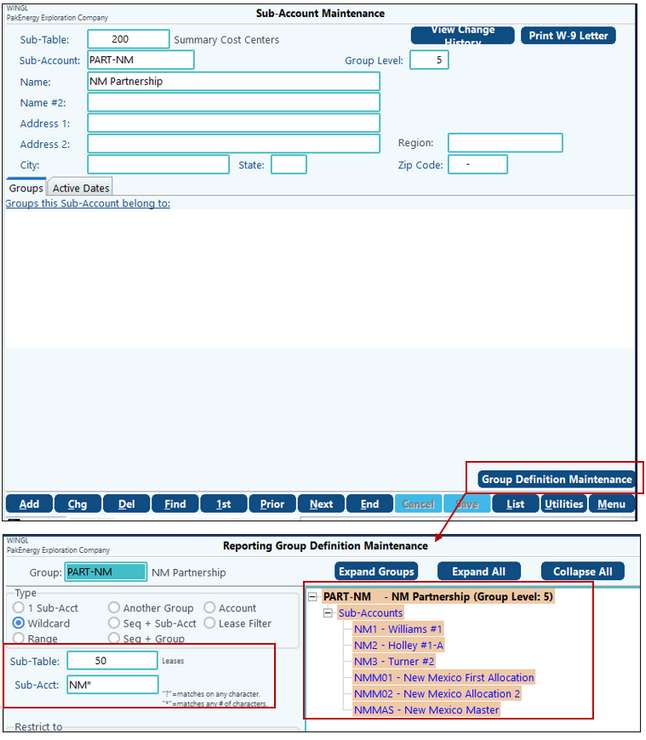
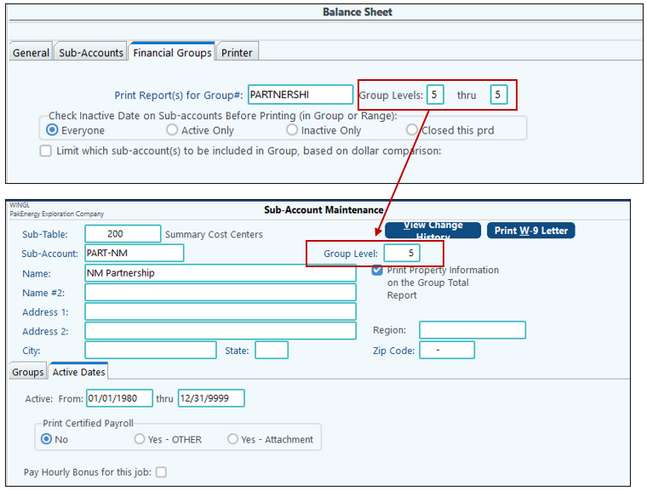
The first step is to set up a financial group for each partnership in Sub-Account maintenance. In the Group Definition Maintenance, add the Sub-Accounts (properties) that are associated with that partnership. This can be done by using the Wildcard feature, entering the property Sub-Table in the "Sub-Table" field and then entering the primary letters of the Sub-Accounts that belong to that partnership with an "*" to pull in every Sub-Account that meets that criteria. For example, the group below is the New Mexico partnership (PART-NM). In the Group Definition Maintenance, the Wildcard option has been chosen with the property Sub-Table entered in the "Sub-Table" field. The "Sub-Acct" field has"NM*" entered so that all New Mexico properties will be included.
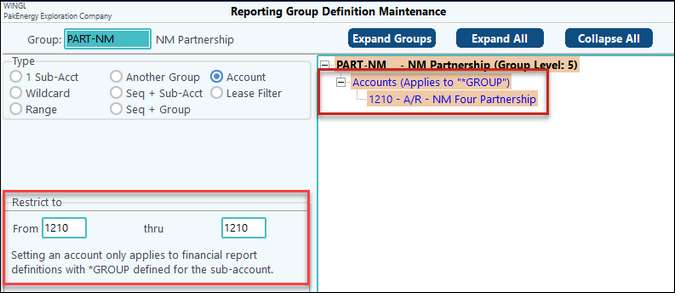
Next, the A/R (Accounts Receivable) account must be included. This is accomplished by clicking on "Add" at the bottom of the screen and then clicking on the "Account" option. When account is chosen, an Account field will appear for the A/R (Accounts Receivable ) account to be entered.
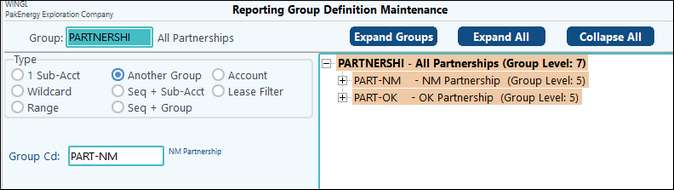
The next step is to set up a partnership master that contains all of the groups that were set up for each partnership. To do this, create another group and code it as the master group. In our example, the master group is coded as "PARTNERSHIP." Click on the Group Definitions Maintenance and choose the option for "Another Group". The "Group Cd" field will appear allowing for financial groups to be individually added. When the group name is selected, click on "Save" at the bottom of the screen and then "Add" to continue adding the partnership groups.
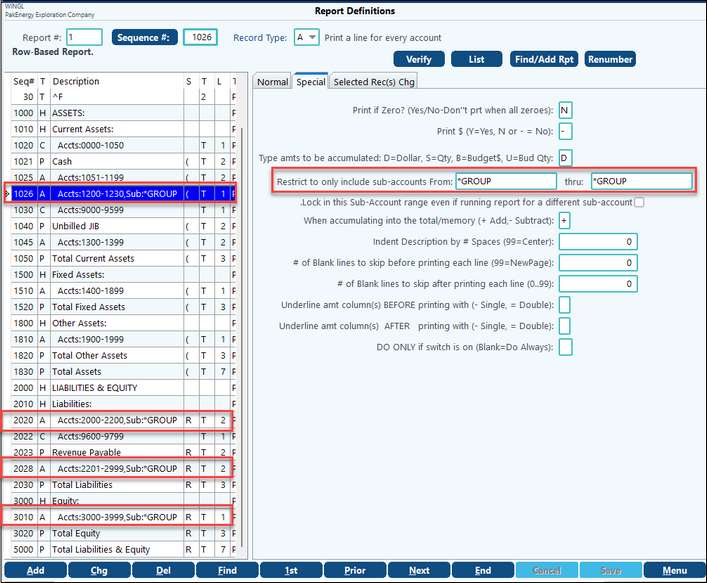
Now the setup for this group containing a partnership is complete. This above steps will need to be repeated for each partnership that a Balance Sheet is required for. When all of this is complete, navigate to the report definitions for the Balance Sheet. The entire "A/R" account range must be coded on the Financial Report Definition with "*GROUP" thru "*GROUP" coded as the Sub-Account range on the Special tab. The same coding will need to be done for the liability and equity accounts as well.
To generate the Balance Sheet, enter the applicable date range, etc. on the General tab. Enter the partnership master group on the Financial Groups tab in order for all partnerships to have an individual Balance Sheet generated. Check or uncheck the option for the company-wide statement to generate based on your preferences. Additionally, if you only wish to see the balance sheets for the individual groups, restrict the Group levels to the level specified on the financial groups when they were made.
Example of a balance sheet for a partnership: