Overview
Crude Oil Data Exchange (CODE) is a standardized way to send and receive run ticket data.
Setup
Company Maintenance > Destination Company
The first step in the process is to create the Destination Company Codes that you receive from your Operator.
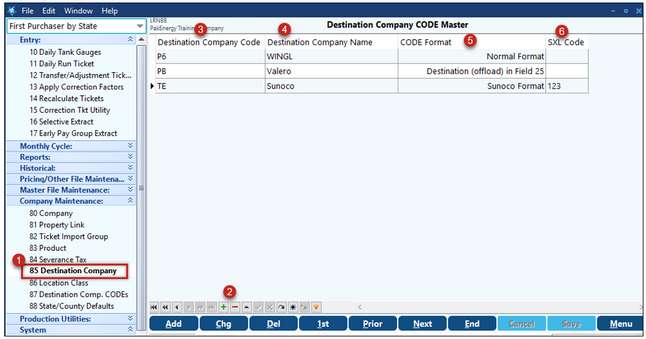
1.Go to First Purchaser module > Company Maintenance > Destination Company.
2.Click Add or use the Green “+” to add a new line.
3.Add the two-digit CODE (Provided by the Operator)
4.Type in Destination Company Name (the Operator company name)
5.Use the drop-down to select the type of format. The “Normal Format” is the most commonly used. The other options are not common and rarely used.
6.The SXL code would be provided by your Operator, if required. This is not common.
Company Maintenance > Destination Comp. CODEs
The next step is to attach our newly created Destination Codes to the properties for the operator.
1.Go to the Company Maintenance - Destination Comp CODEs menu.
2.In the Operator field, use the drop-down menu to select the Operator.
3.In the Destination Company CODE use the drop-down to select the corresponding Destination CODE (set up in the previous step).
4.All their properties will appear in the window below.
a.To select all at once use the Select All button. To select multiple properties at a time without selecting all hold the Ctrl while you select the properties with you mouse. To select a Range of properties, use the Shift key while selecting the first property in the range and the last property in the range.
b.Then you can apply the CODE to all with the Apply CODE to Selected button at the bottom.

The properties selected with now how the Operator’s Destination Company Code applied.
To clear a property’s code, select the property and then select the Clear Selected button. A pop-up box will appear asking if you are sure you want to do this, select yes.
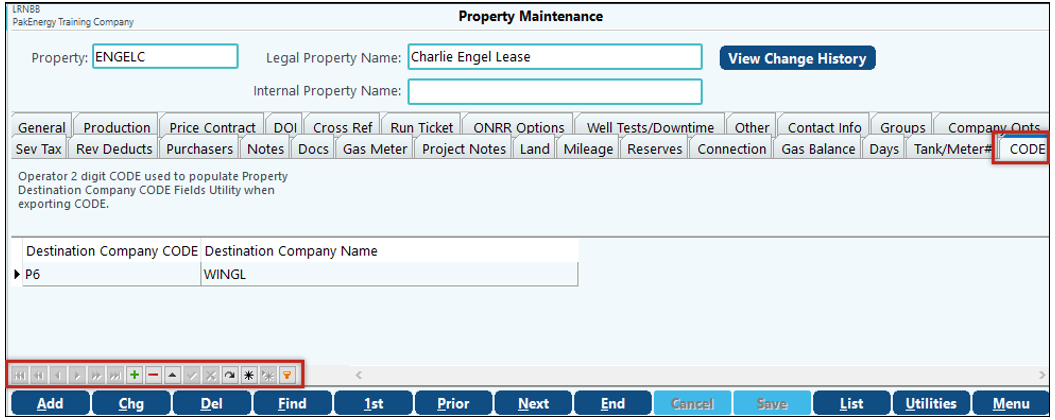
You can also go to Property Maintenance > CODE tab for each property and manually type the CODE in one at a time.
Note: More than one Destination Code can be added to a property.
Process
Daily Run Tickets
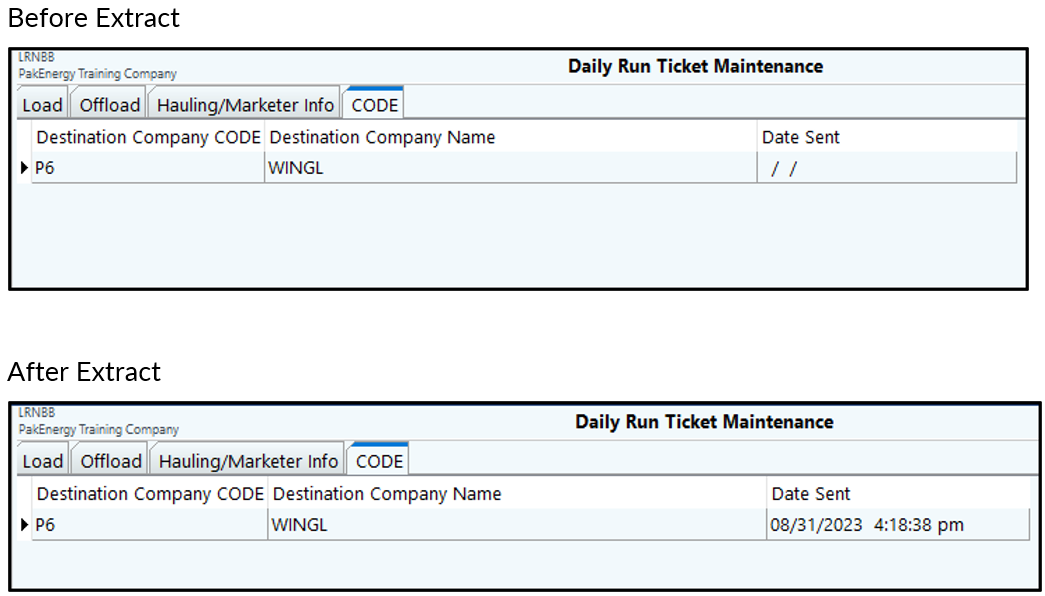
Tickets are entered in as normal. The only thing to note here is the CODE tab. Once the ticket has been entered and saved, the CODE tab will show the Destination Company. The Date Sent field will be automatically populated once the Export Run Tickets in CODE Format has been run.
Reports > Tickets tab - Export Run Ticket in CODE Format
This will create a CODE file for Run Tickets and Run Statements or both to send to you Operator(s). You will typically run this and send to your operator so they have time to review before you start your cycle.
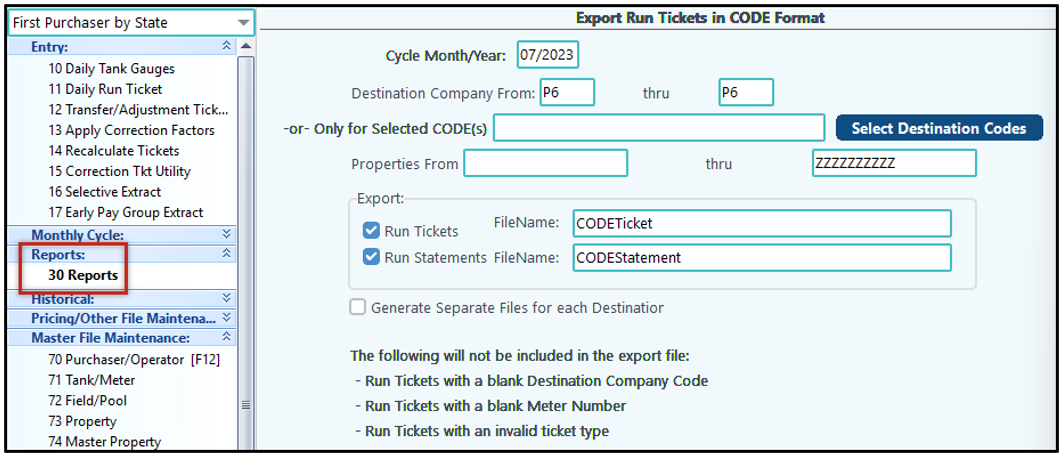
1.Enter the Cycle Month/Year for the tickets and/or Run Statement to send
2.Enter the Destination Code for the Company you want to send a Code file to. Leave Blank thru ZZ to create all files at once. You can also use the Select Destination Codes button to select multiple Destinations that are not in a range.
3.Enter the Property or properties you would like to create a file for. Leave blank thru ZZZZZ to send all at once.
4.Export- Select to create a CODE file for Run Tickets, Run Statements, or both by selecting the box or boxes. Enter the File Name you would like to be used when the file is created.
5.Select if the files Separate Files for each Destination should be created.
6.Select OK when finished
Note: The screen states the types of tickets that will not be included in the export.
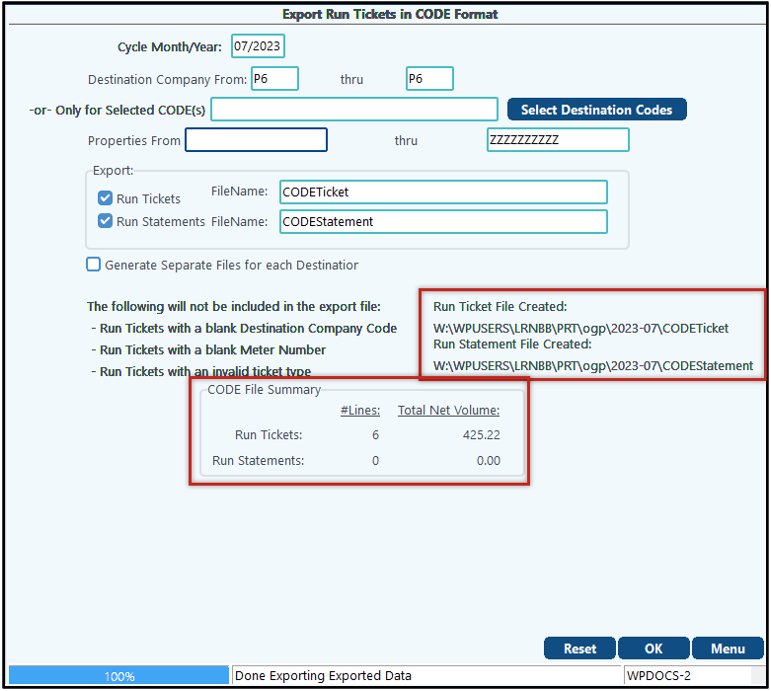
1.Progress will populate a message when the Export is finished.
2.The File Location will appear on the right side of the screen.
3.A CODE File Summary will populate stating the # of lines in each file and the Total Net Volume
4.View Log - A log of the file created will populate and state any errors if any occurred.
The Reset button will strip the Sent information off of the tickets so they can be sent again.
Once the file is created you can upload it to PDS.
How to Import CODE
1.In the Payroll Module > Employee Master – set up a Transporter Code. The First Purchaser > Type option should be set to Third Party. Once this is set up, the First Purchaser system will recognize the “Employee” as a Transporter.
In this example the Transporter # will be TRANS.

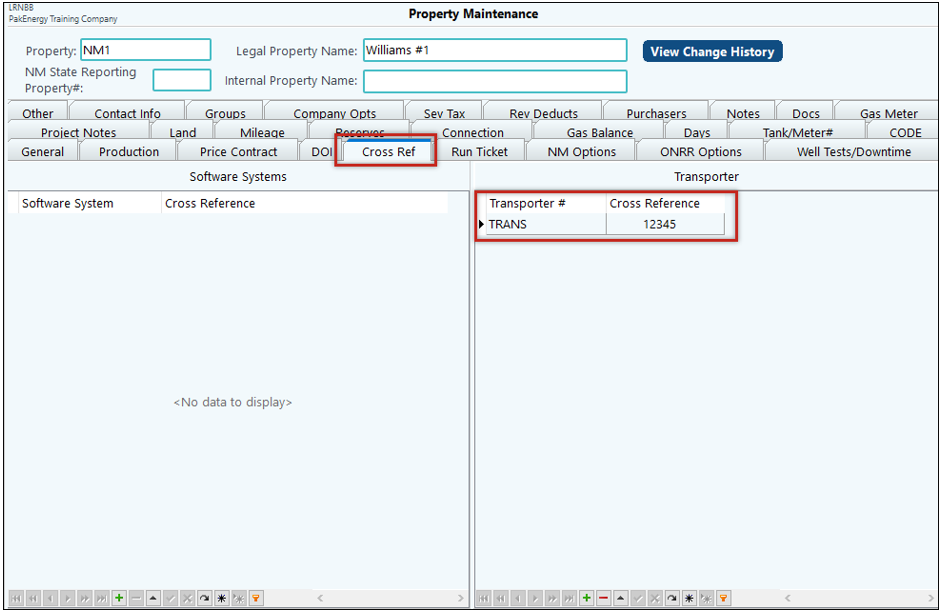
2.In First Purchaser > Property Maintenance > Cross Ref tab - use the green plus sign to add the Transporter # and the Cross Reference (Oildex CODE Property number). This will need to be done for all properties that you will be receiving a CODE file for.
3.To import the file, go to Production Utilities > Import Run Tickets. Under File Import Type, select CODE format. In the Transporter field, select the Transporter you need to import.
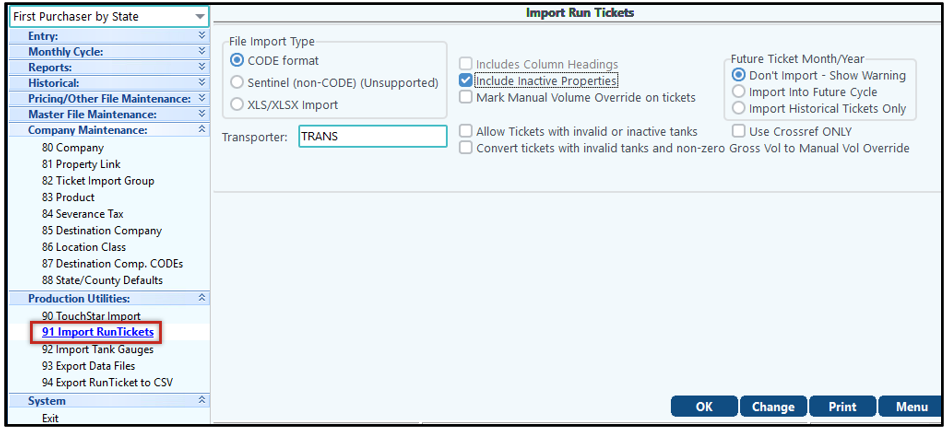
Include Inactive Properties |
This will import properties that have been made Inactive in Pak Accounting. |
Mark Manual Volume Override on Tickets |
Rather than Auto-Calculate tickets based on tank strappings and meter readings in Pak Accounting, bring in volumes from the CODE Import file and marked the ticket as Manual Volume Override. |
Allow Tickets with invalid or inactive tanks |
This will import tickets without error if the tank in Pak Accounting has been made Inactive or does not exist. |
Convert tickets with invalid tanks and non-zero Gross to Manual Vol Override |
If the tank does not exist in Pak Accounting (or Tank numbers don’t match), but the CODE file includes Gross BBLS, the ticket will be marked as Manual Volume Override and the Gross BBLS from the file will be imported on the ticket. |
Once the options you would like to use have been selected, choose the OK button and a pop-up window will appear. Find the file that you would like to Import and select Open.
The file will either Import and list a Time Stamp that can be used to Undo the Import if needed, or if errors occur the errors will be listed on the Import screen. These errors will need to be corrected and the file re-imported.