From time to time, computer equipment will experience hardware or electrical problems. The rebuild option can rebuild all the data files and their associated indexes. As part of the rebuilding process, the program also checks the validity of the data to detect any corruption.
This option should also be executed if you are running the program when a power failure occurs. The system makes extensive use of file indexes, which are usually not updated until you exit the program. After power is restored, enter the company you were working in when the power failure occurred, and select the rebuild option.
You should not choose to rebuild files without contacting your Customer Success Team at the Direct Support phone # shown on the bottom of your screen.
All other users MUST be out this company prior to beginning a rebuild.
You can rebuild the whole company by using the "Select All" (select all is the default) and clicking on "Start Rebuild". Or you can select which items to rebuild by "Unselect All", then check which item to rebuild and click on "Start Rebuild". Additionally there is a contains field at the top of the screen that will allow for a file name, or part of a file name to be entered, in order for the system to search for the file.
During the rebuild, the system displays the file currently being rebuilt and a bar at the bottom of the screen indicating the percentage of records processed. The system will incrementally highlight the bar as it proceeds, which helps you determine how long the process will take. If the boxes that make up the bar are not being highlighted, it might indicate the computer has locked up during the rebuild. The bigger the file is (as indicated by the record number just above the bar), the longer the rebuild will be, and the slower the boxes on the bar will be highlighted.
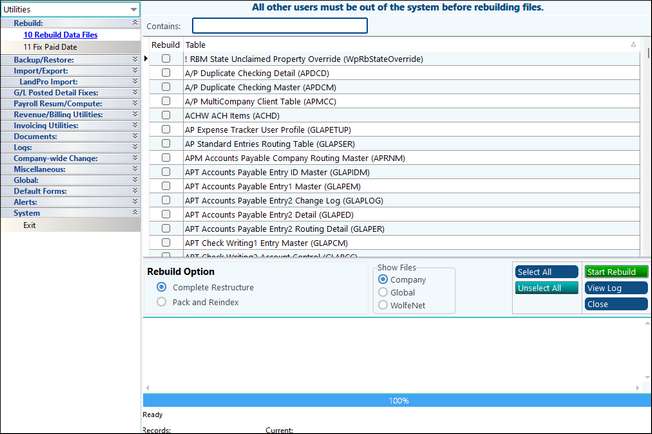
Each rebuild creates a log of what files were rebuild and if there were any errors. The log can be viewed using the View Log button.