Purchase Order Integration with Open Invoice
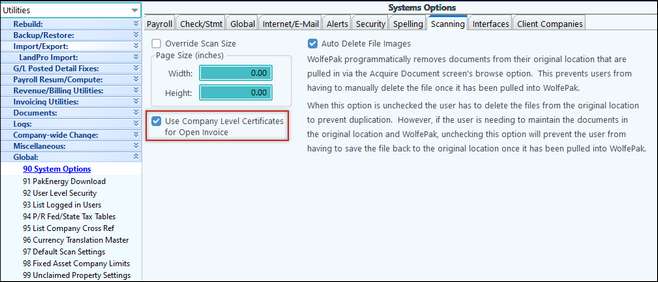
1.Certificates: The Purchase Order Integration with Open Invoice requires a set of security certificates that acts as a “key” between Pak Accounting and Open Invoice. The certificates are placed at the global level (GL4\Certificates) if only one client is accessing Open Invoice. If there are multiple clients accessing Open Invoice, such as in a service provider setting, the files would need to be placed at the company level (GL4\Certificates\XXXXX). If using the company level certificates for OpenInvoice, the user must let Pak Accounting know by going to the Utilities module > Global > System Options > Scanning tab. Make sure to check the “Use Company Level Certificates for Open Invoice” box.
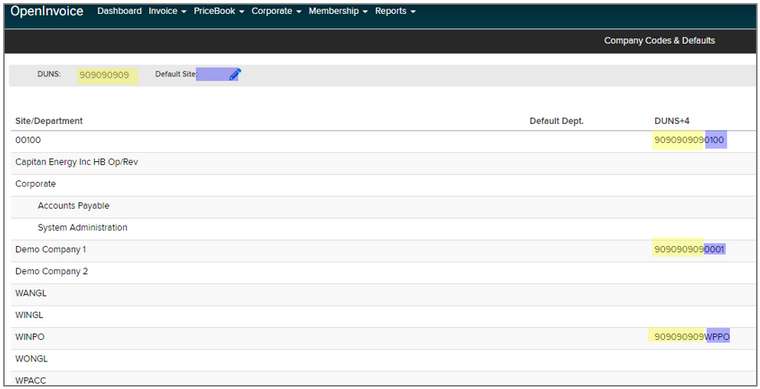
2.DUNS Numbers: A DUNS Number is a nine-digit number that acts as an identifier for the Open Invoice buyer. There is an additional four-digit code (site code) that can be added for each buyer site. If the DUNS+3 is not utilized, then all PO’s will be available to all of the buyer sites under that buyer’s profile.
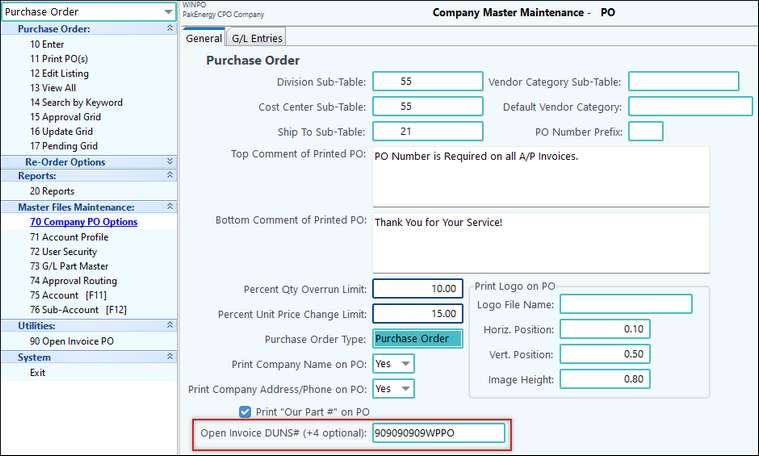
3.DUNS Number in Pak Accounting: The DUNS Number will also need to be specified in the Purchase Order > Master File Maintenance > Company PO Options > General tab. IF the DUNS Number is not entered in the Company Maintenance, all PO’s will be rejected.
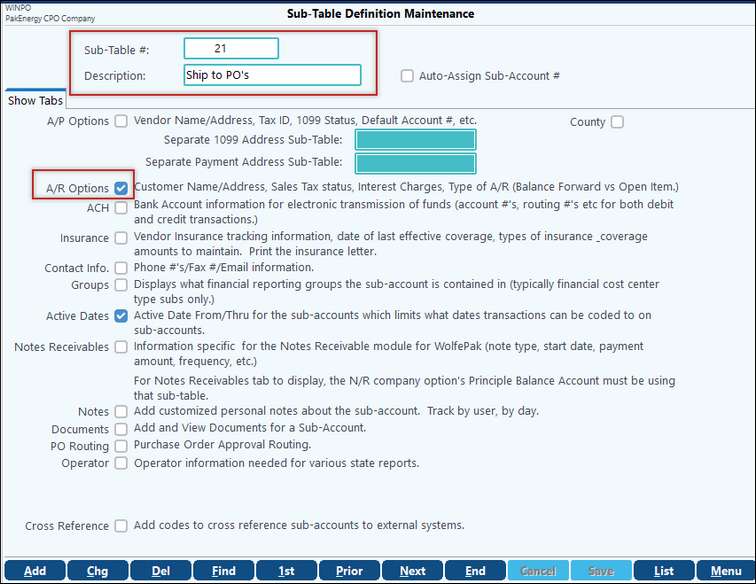
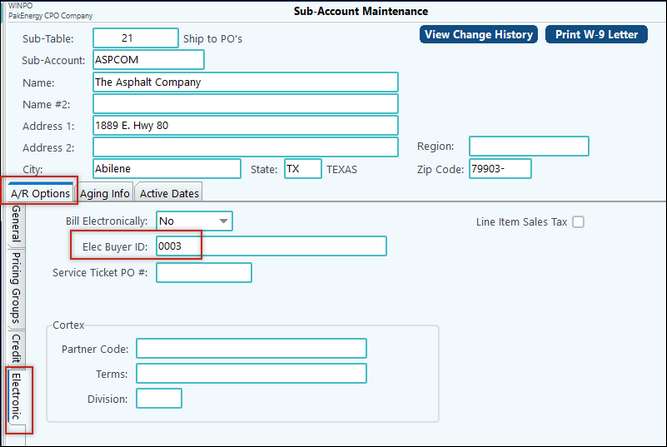
4.If a “Ship To” Sub-Table is being used in Pak Accounting with “Ship To” Sub-Accounts specified, a DUNS Number will need to be entered on the AR Options tab/Electronic tab In the Elec. Buyer ID field. If this tab is not on the Sub-Account then it will need to be added to the Sub-Table in the General Ledger module > Master Files Maintenance > Sub-Table.
NOTE ABOUT THE ELEC BUYER ID FIELD: This can share the same DUNS Number as was entered in the Purchase Order Company Maintenance or the individual site code can be entered here.
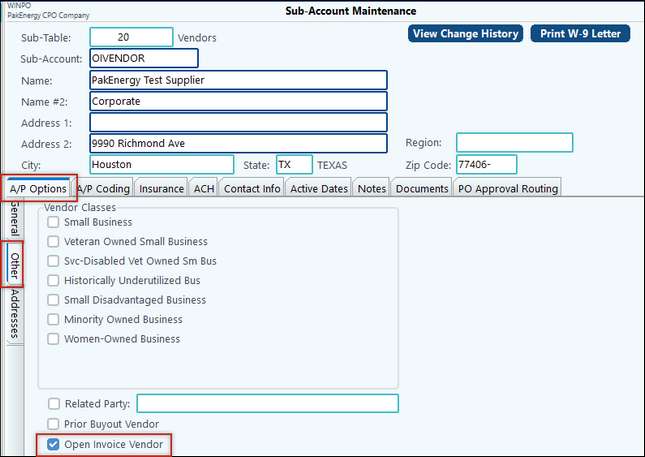
5.Open Invoice Vendors: Every vendor that will be sent over to Open Invoice with a PO will have to have their Sub-Account associated to a vendor in Open Invoice. In addition you will also need to select the Open Invoice Vendor box on the vendor Sub-Account AP Options tab/Other tab.
|
Before initiating the use of the Pak Accounting/Open Invoice integration, please review the notes below as each one is important for the success of the integration. Please Review: 1.The following Pak Accounting Purchase Order Statuses on PO’s will dictate whether the PO is sent to Open Invoice a.Approved b.Being Ordered c.Partially Received d.Fully Received The PO must be in one of the above four statuses to initiate the send. 2.A change of a PO will initiate the send of the change if the last edited date for the PO line item is later than the Last Sent to Open Invoice date. 3.Only GL type parts are being sent at this time. 4.If a PO contains a negative line item Pak Accounting will “roll-up” the change with the original line item and send the change to Open Invoice. The negative line item will not be visible in Open Invoice but the change to the quantity/dollar amount for the change will be visible. 5.WP will not send any zero-dollar purchase orders. 6.All PO’s are assumed to be in OI Accepted state.
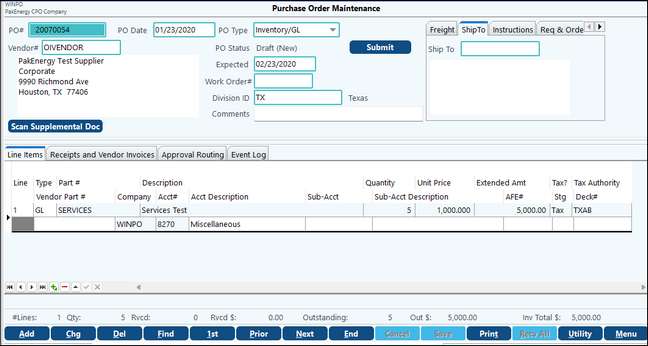
Flow of a Purchase Order using the Open Invoice Integration Following is the flow of a Purchase Order using the Open Invoice Integration to include the invoice consumption by Pak Accounting’s Accounts Payable module using the Open Invoice AP integration. 1.Create the PO as would normally be done and route if approvals are being utilized. Once the PO is in one of the statuses to send (Approved, Being Ordered, Partially Received, Fully Received) it will be waiting for the next push to Open Invoice
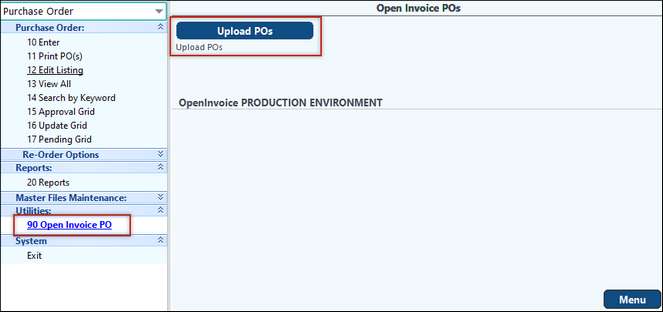
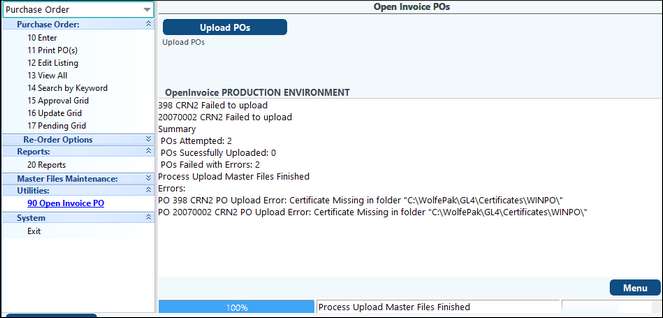
2.If authorized for the Open Invoice Integration a new menu item will be visible under the Utilities section of the Purchase Order module: Open Invoice PO. Click on Upload PO’s when ready.
The Summary screen will provide you with the detail of what PO’s were uploaded and if they were successful. This screen will also alert you to any warnings or errors associated with the PO’s.
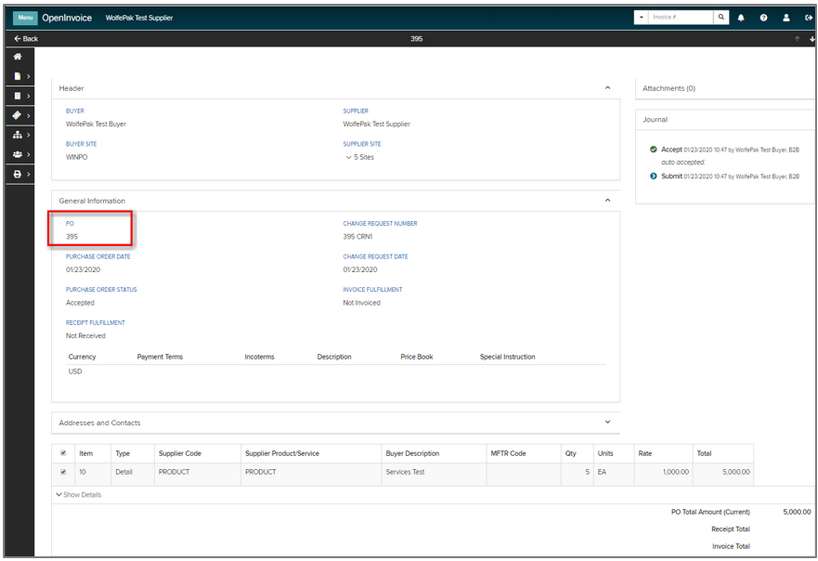
PO 395 was successfully sent to Open Invoice. The Supplier will now take over and create the invoice when necessary.
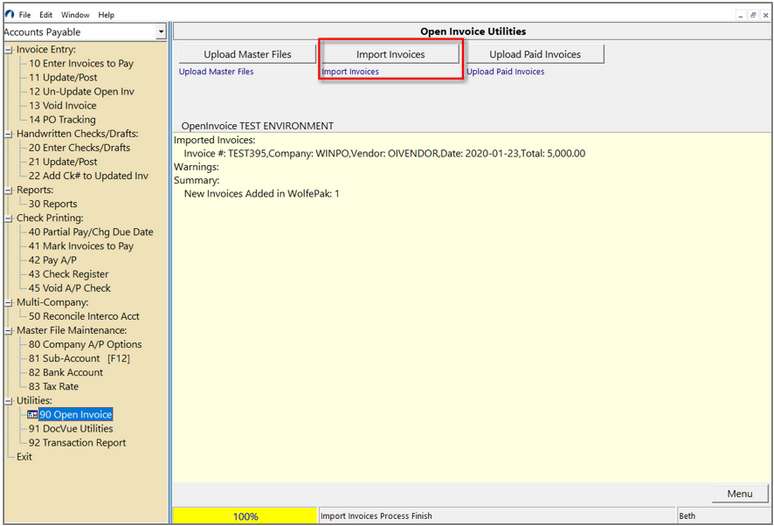
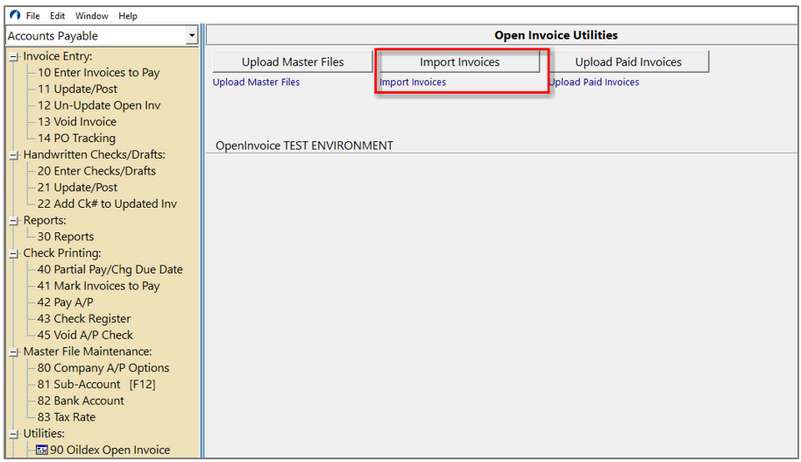
3.Once the Supplier has submitted and invoice to the Buyer (client) it will reside in the Open Invoice AP platform to be coded. When coding is complete and it is approved for extract by Pak Accounting, it can be imported into Enter Invoices to Pay. To Import AP Invoices from Open Invoice, go to the Accounts Payable module/Utilities/Open Invoice and click on the Import Invoices button. The summary screen will let you know what was imported.
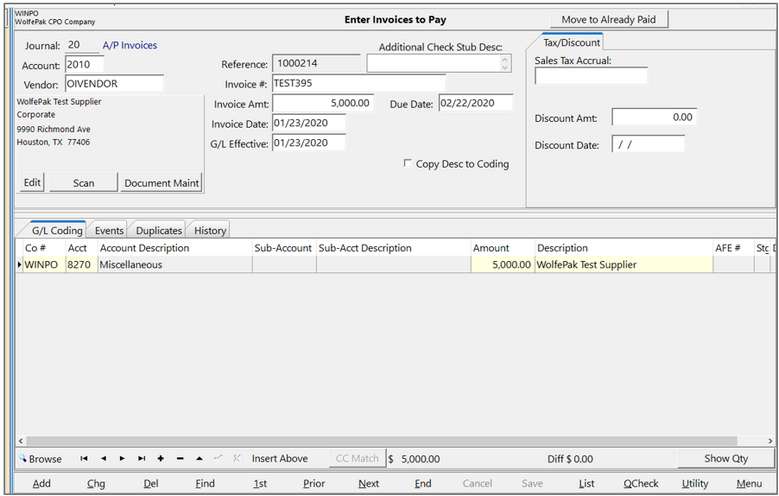
4.The invoice will reside in Enter Invoices to Pay. Review the invoice as necessary and post to the general ledger.
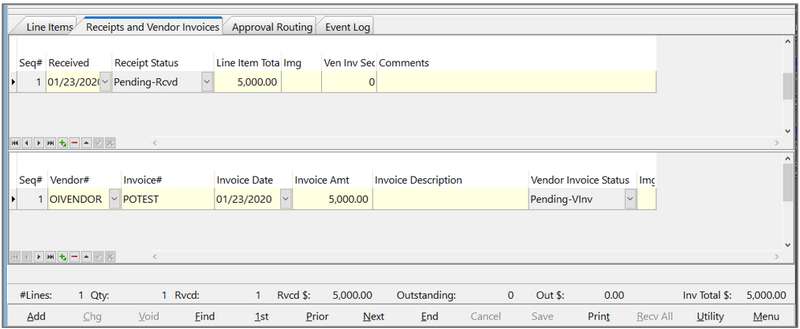
****IMPORTANT**** YOU MUST RECEIVE THE PO BEFORE MATCHING THE INVOICE!!! 5.Once the invoice is posted, it is necessary to go back to the Purchase Order module and update the PO. The initial view of the PO will look like the one below. The receipt has been matched but the invoice that was imported needs to be associated to it.
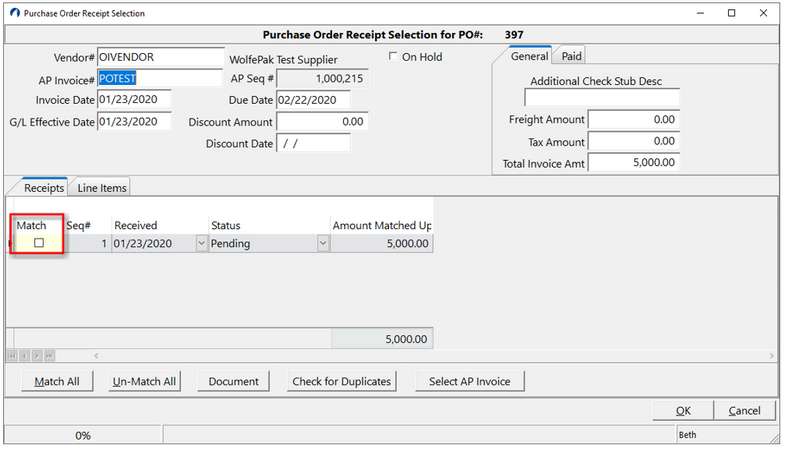
6.Click on the invoice line item and the invoice will have all the pertinent information filled in. At this point the match button will need to be clicked for the items that match the invoice amount. When finished click OK and then Menu out of the screen.
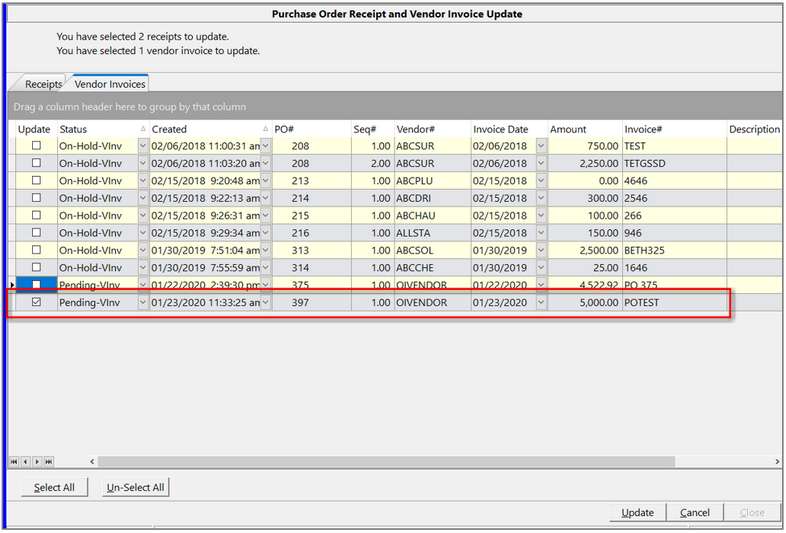
7.Update the invoice. This will not make any entries to the general ledger. The initial entries were made when the invoice was updated in the Accounts Payable module.
NOTE: The Pak Accounting/Open Invoice Purchase Order Integration can accommodate the receipt of multiple invoices per PO. This would be done the same way as above. The invoice for the partial receipt would be imported via AP and processed through using steps 4-7. |
Enverus and Pak Accounting teamed up to provide a solution for companies whose suppliers are utilizing the Open Invoice process. Together we developed a connector to facilitate the seamless import of invoices and export of payment information between Pak Accounting and Open Invoice. The flow back and forth between the systems allows for both platforms to stay in sync. There are a few quick and easy steps to setup the Open Invoice Connector. The first step is to initiate the process so that teams from Enverus and Pak Accounting can collaborate on the best setup process for your company. Once you have the process identified, implemented, and testing complete, you can set up the Enverus Open Invoice connector in your production company in order to make the Accounts Payable process more efficient.
Open Invoice Setup
1.Work with Oildex to create a certificate for the secure transfer of data. The certificate will reside in the GL4\Certificates folder. Open Invoice will not integrate with Pak Accounting without the certificate. If there are multiple clients accessing Open Invoice, such as in a service provider setting, the files would need to be placed at the company level (GL4\Certificates\XXXXX).
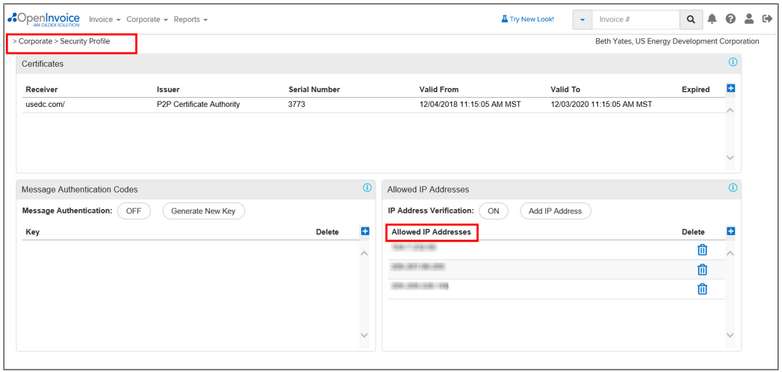
2.Your IP address(es) must be added into Open Invoice/ Corporate/Security Profile.
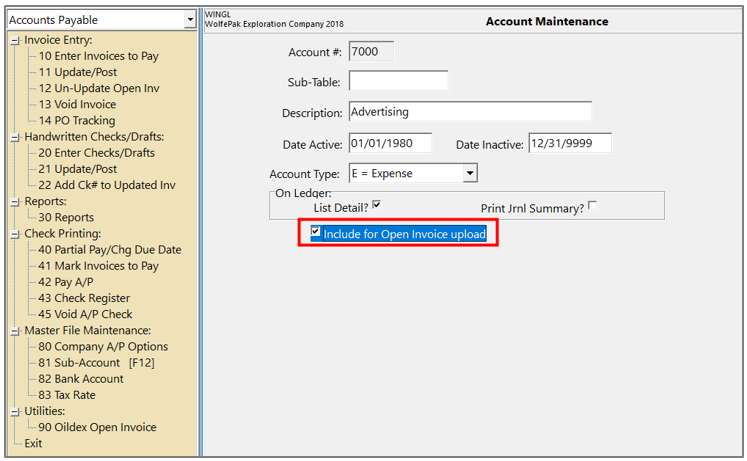
3.In Pak Accounting, mark accounts that will need to be integrated with Open Invoice by checking the box to include. You can include any accounts that you wish to include but this would typically be your expense accounts and billing accounts. See screenshot.
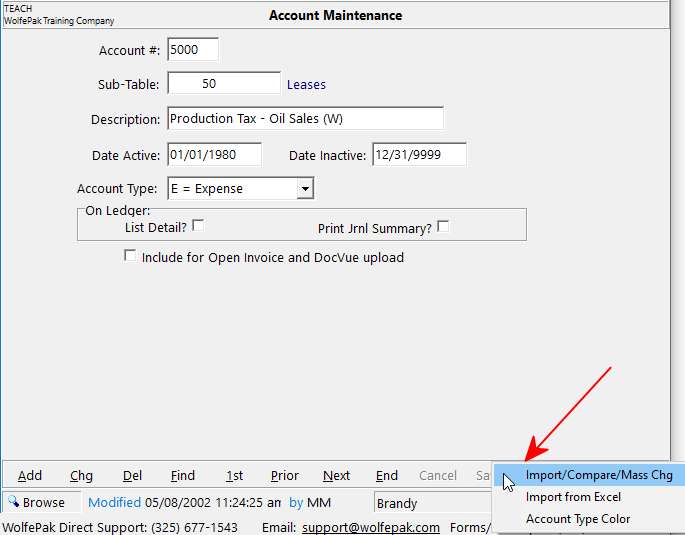
There is a utility in Account Maintenance (F11) that allows changes to multiple accounts at one time in order to include those accounts in the upload.
•Click on Utilities/Import-Compare-Mass Change.
•Select the “ODOpenInvoiceIncludeAcct” option.
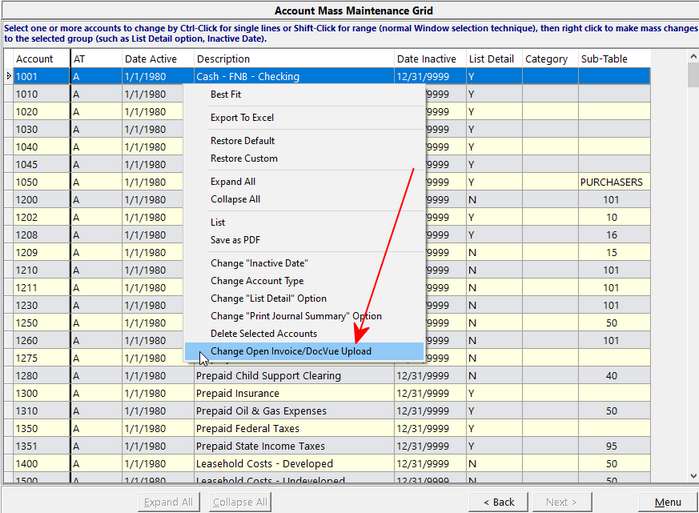
•Click Next and multi-select the accounts you wish to include.
•Right-click and select Change Open Invoice to Yes to finish the process.
This will automatically change multiple accounts at once saving you the time it takes to check the box one at a time on each account.
Using Open Invoice
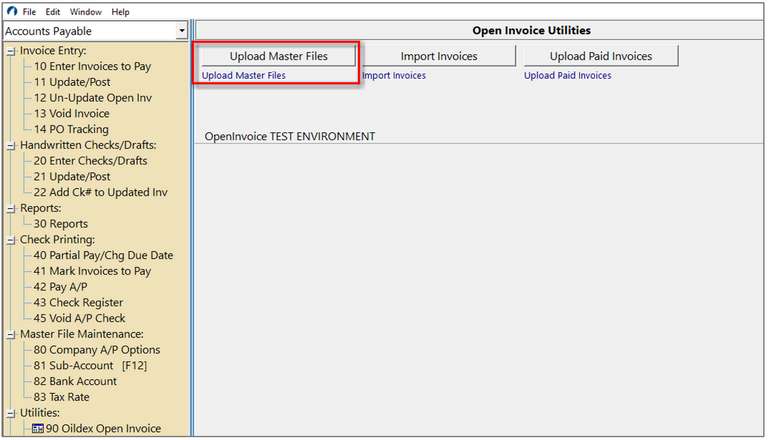
1.In the Accounts Payable module after your company has been licensed for Open Invoice, you will have a new menu item, “Open Invoice,” in the Accounts Payable module. Once the above three steps have been completed you can initiate the connection to Open Invoice and send master files from Pak Accounting by clicking on the Upload Master Files button. The connection will let you know if it was successful. The upload of the master files can take a while depending on the magnitude of data being uploaded to Open Invoice. Remember that this process is sending cost centers, and AFE information over to Open Invoice.
You can now log into Open Invoice and code invoices from your suppliers (vendors). The option is available to send the invoices to through workflow per your Open Invoice setup, or if you prefer, you can use the Approvals process in Pak Accounting for your workflow if licensed for Pak Accounting’s Scanning module. The Scanning module will also allow you to import any attached images from Open Invoice to Pak Accounting.
When you are ready to import invoices from Open Invoice into Pak Accounting, you need to go to the Accounts Payable module/Utilities/ Open Invoice. Click on the Import Invoices button. Imported invoices will display in the summary section with the invoice number, dollar amount, and vendor name. If there are no invoices, Pak Accounting will let you know that there are none in the Summary Section also. You can go to AP/#10-Enter Invoices to Pay and process your invoices as normal to include paying them
NOTE: Your Accounts Payable/Company AP Options setting on the A/P Entry Tab/Payment Terms determines the Due Date. Pak Accounting will look to the Vendor Sub-Account Maintenance for the due date setting and then to the Accounts Payable Company Master if using the company default. You cannot select “Duplicate Previous” as the due date setting. When importing invoices, Pak Accounting will not see a previous invoice to duplicate. Additionally, if you have a due date in Open Invoice it will not transfer to Pak Accounting.
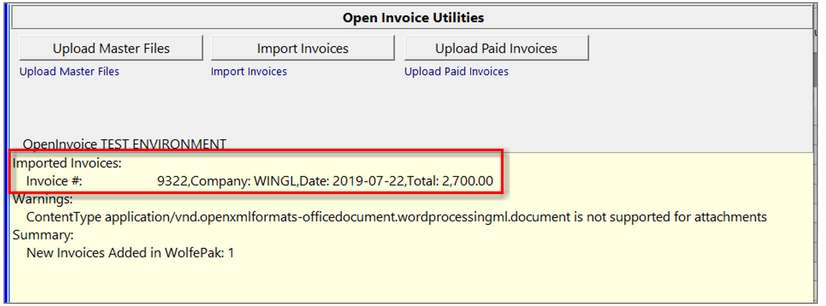
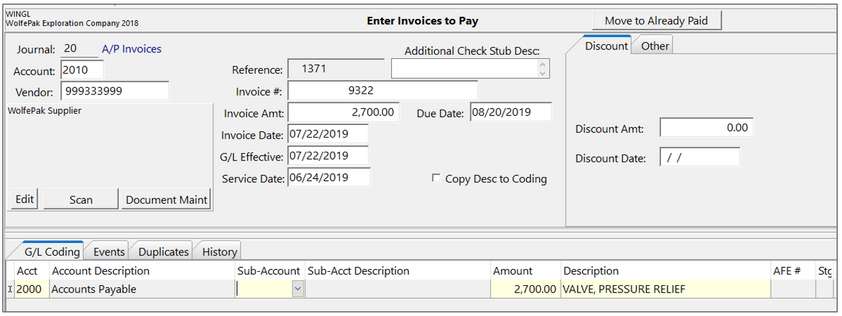
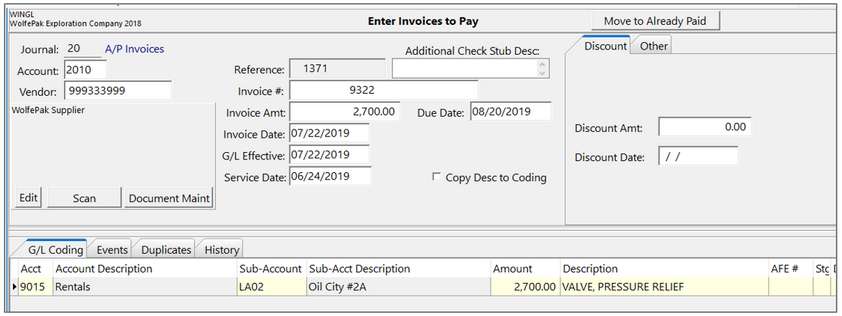
From this point you would process the invoices as you normally would in Pak Accounting. Also, if coding was incorrect during when the invoice import you can change the coding in AP/Enter Invoices to Pay.
Incorrect Coding:
Correct Coding:
Payment Example:
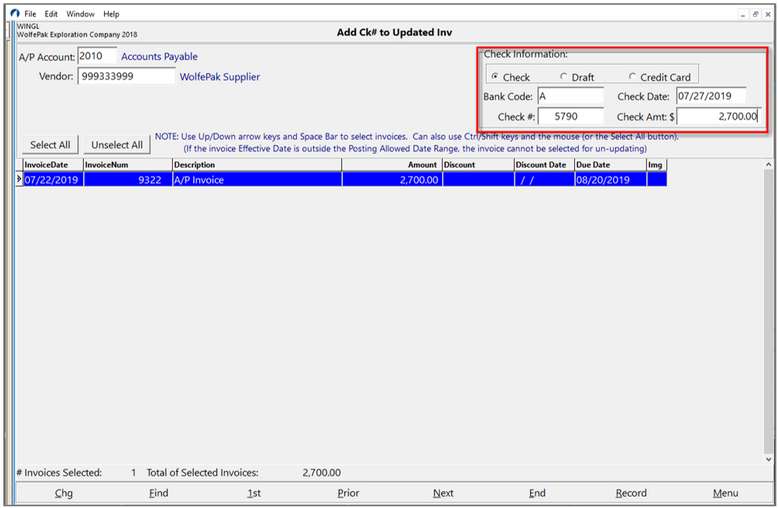
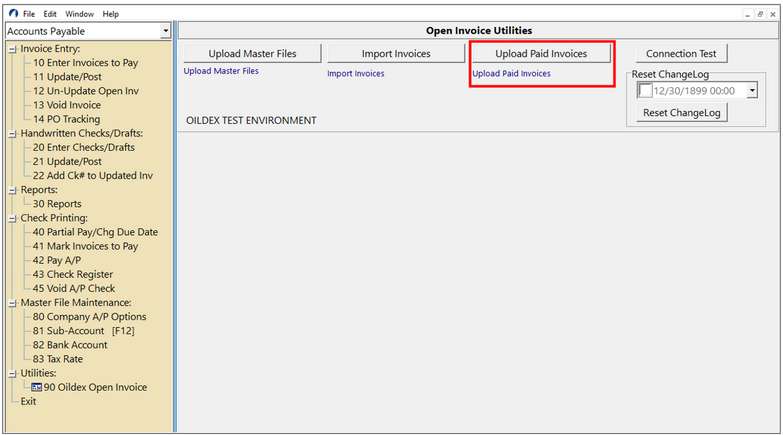
Once you have paid invoices, you can send the payment information back to Open Invoice by clicking on the Upload Paid Invoices button. This will mark the invoice paid in Open Invoice.
The invoice imported was paid with check number 5790.
When invoice payment is ready for upload, click on the Upload Paid Invoices button.
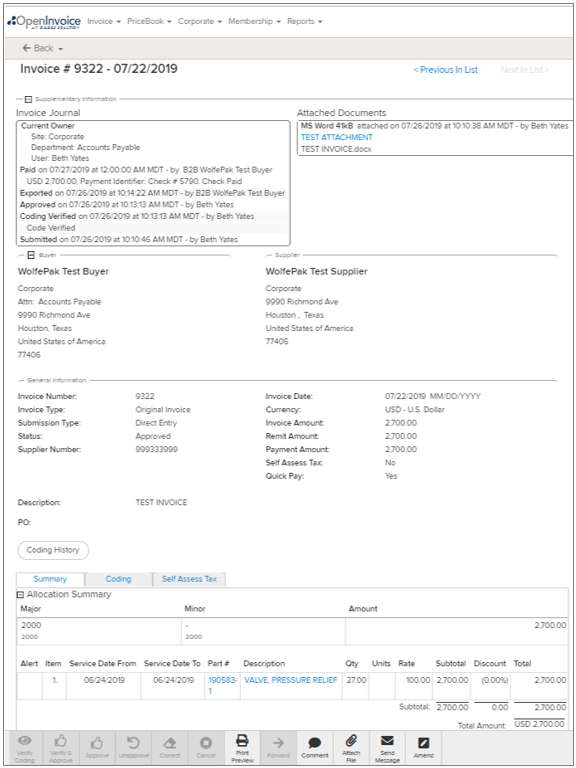
The payment information will send to Open Invoice and mark the invoice as paid with the payment information. At this point the process is complete.
Additional Open Invoice Options
There are additional added options for Open Invoice in the Accounts Payable module/Company AP Options/AP Entry tab. These options are detailed below.
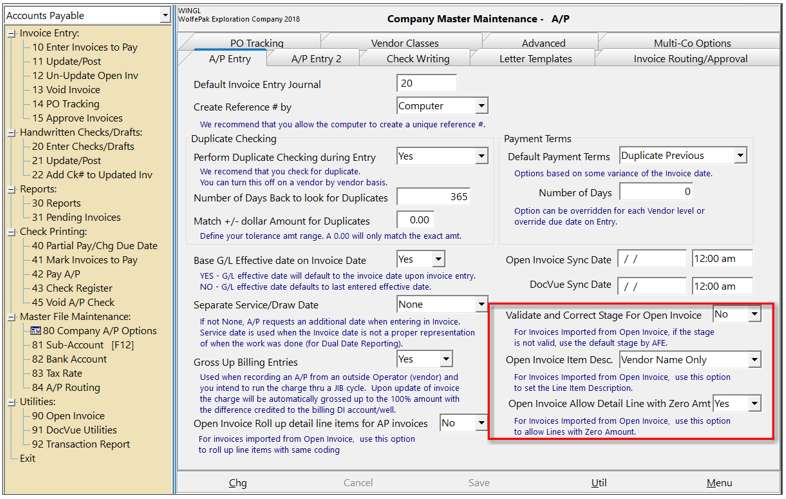
Validate and Correct Stage for Open Invoice- This is a Yes/No option designed to ensure that if an invoice is imported with an AFE that the correct stage is populated for the invoice based on the GL account.
Open Invoice Item Desc. - This option dictates whether the imported invoice will display the Vendor Name Only or the Vendor Name and Description in the line item description field. It is advisable to review JOA’s for statement requirements.
Open Invoice Allow Detail line with Zero Amt. – This option allows for line items with zero dollar amounts to be imported. This is a frequent occurrence in regards to B2B vendors in regards to sales tax.
