Adding a new Purchase Order:
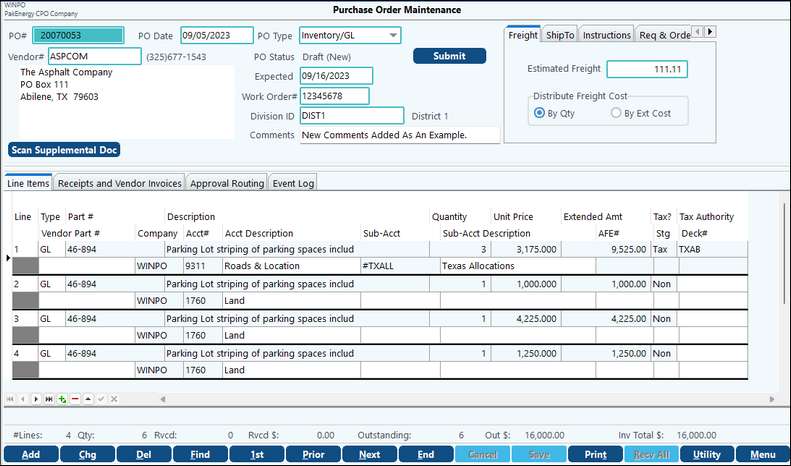
The PO number is automatically assigned when adding a new PO.
1.Enter the PO date, defaults to today's date.
2.Enter the vendor (A/P vendor).
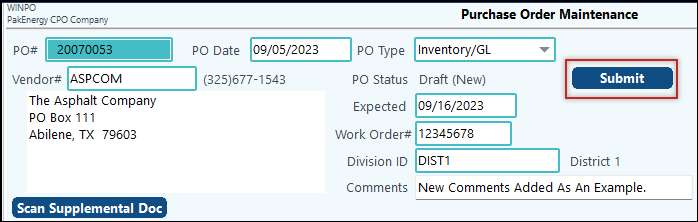
3.The initial PO Status will be Draft (New). It will stay in Draft status until the user submits the PO for further processing by clicking on the Submit bar. This option cannot be manually changed.
4.The Expected Date is the date you expect the items or services to be received or completed.
5.Work Order # is an optional field where the user can enter ticket numbers or requisition numbers.
6.Division ID: If the user has a default Division ID set up in User Security, that default Division ID will populate this field. The user is able to change this to another Division ID authorized for this user. The description for the Division ID will display next to the Division ID field.
7.Comments- Any information entered in this field shows in the Edit listing and check stub in Accounts Payable. It does not appear on the PO.
8.Estimated freight is the amount the user anticipates the freight will be. This field is not a required field as there will be instances where no freight will be charged.
9.Ship to allows the user to enter the code of an alternate shipping address in the table identified in GL Master File Maintenance Company Purchase Orders Ship To Sub-Table field.
10.Instructions allow the user to enter any special handling instructions for the delivery.
11.Req & Order identifies the user responsible for placing the order. This defaults to the user creating the PO unless there is a Default Orderer ID set up in User Security Maintenance for the user creating the PO.
12.Close Options - This option allows the user to define whether the purchase order should (a) Automatically close When Complete, (b) Keep Open, or (c) Close Next Update by clicking on the desired choice.
13.Information for the parts, supplies or service to be ordered are entered on the Line Items tab. There are two types: GL for GL type POs or INV for Inventory type POs. You can have both types on the PO if needed. If the Part # being ordered already exists, you may use the lookup feature and select the part number needed. If the part # does not already exist, you may enter it at this time. You will receive a prompt asking if you would like to add it to the Vendor Item Master. If this is a part or service that may be ordered on a regular basis, select Yes. If not, select No. The cursor will advance to the Description field where you may enter a description of that part or service. After saving that, the cursor advances to the Quantity field. Enter the quantity desired. In the next field, enter the unit price of the item you are ordering. The extended amount is calculated and automatically populated. Next, select where the item is taxable or nontaxable. Enter the general ledger account to be charged. Enter the Sub-Account to be charged if one is required. If an AFE is associated with this expense on the lease being charged, enter the AFE, stage and deck. Continue entering items until all items for this PO have been entered.
The PO is still in Draft status at this point. If all items have been entered, change the PO Status from draft to submitted by clicking on the Submit button. The next PO entered will default to the type that was selected on the previous one (GL or INV). If the type is INV the tax column will be made non-taxable.
After changing the status from draft to submitted, 2 bars Approve and Reject will appear. If no changes are needed, click on the Approve button.
If the PO total is within the user’s approval limits, the status will change to On-Order. If the PO amount exceeds the user’s approval limits, the status bar will be grayed out for this user and the PO is routed to the next approver. When all required approvals have been obtained, the PO is ready to send to the vendor. Click the On-Order button.
The user with higher approval limits may access the PO may access the PO in one of two ways. If the user knows the specific PO number, it can be accessed through the Enter screen and use the Find to go to that PO. Or, all POs needing approval can be viewed by opening menu Approval Grid. The PO Approval tab defaults to displaying PO's Pending approval. The user may then double-click on the PO or click once then click on View PO.
NOTE: The Approvals Grid contains a Ship To column to identify the associated Sub-Account.
Utility
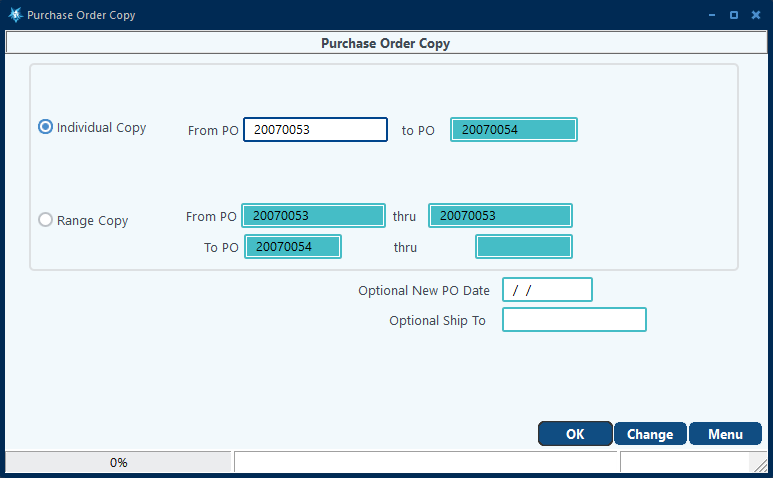
Copy PO- This utility provides the ability to copy the information from an existing PO to a new PO in either an individual copy or in a range copy.
Note: If creating multiple different copies, need to Menu out between changes. If desired, new "PO date" and "Ship To" information can be entered in the "Optional New PO Date" and "Optional Ship To" fields. When a PO is copied the status will be set to "Draft" and the Detail line items will remain the same except for the "Ship To" Sub-Account. The Receipts and Vendor Invoices tab, Approval Routing, Event Log, and any scanned images will be cleared out. This information will be populated as the PO is processed. Click "OK" to copy the PO.