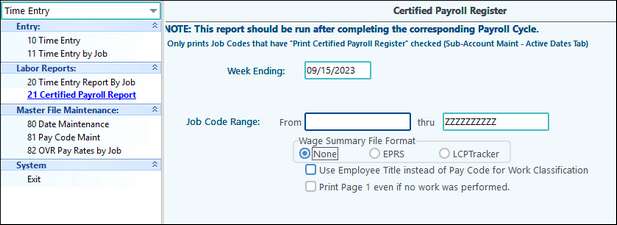
Follow the steps on the Time Entry Payroll Checklist for setting up to print the Certified Payroll Register, go to Certified Payroll Register in Time Entry and set the Week Ending and the Job Code Range of the Register and click on print. Certified Payroll information is setup in Payroll / Advance Options / Time Entry Options.
Example Report:
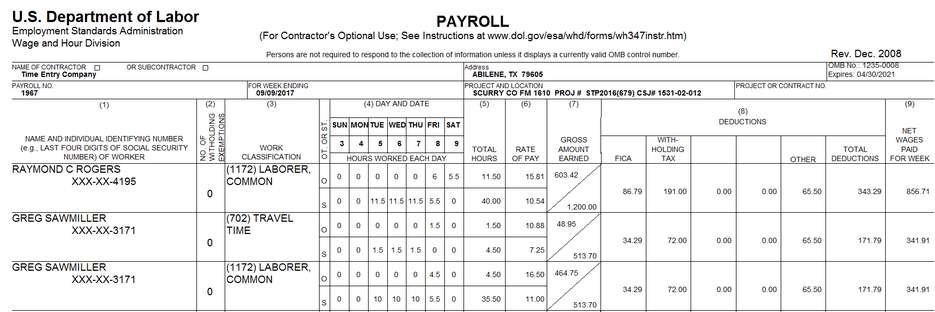
Ability to create a file to send to TxDOT for our certified payroll filers The file(s) will be created when running #22 (or 21) Certified Payroll Report in Payroll Time Entry if the “Create Wage Summary File” box is selected.
| 1) | In the Payroll menu, under #81 Advanced Options, go into Time Entry Options tab. On the right side of page, under "First Day of Week" field is a new field - "Contractor ID". This is your companies Contractor ID. |
| 2) | In the Sub-Account Maint screen, under the AP Options tab, you will need to put your job / project number in the "Check Memo Description" field. |
| 3) | Make sure on all of your employees, in the Employee Master Maint, under the "Other" tab - that their "Sex" is assigned, and that if they have an "Apprentice Experience" amount to put it in the new field "Apprentice Experience" on the lower right side of the page. |
| 4) | In the "Time Entry" module, when you run your #21 Certified Payroll Report, you will now have the option to "Create Wage Summary File". This will create the file to send to TxDOT. The file will be in the \GLN32\ccccc\EDI\TimeEntry folder (where ccccc is your company code.) The file name will be pppp_yymmdd.txt, where pppp is the project / job code and yymmdd is the date selected in the certified payroll report. |
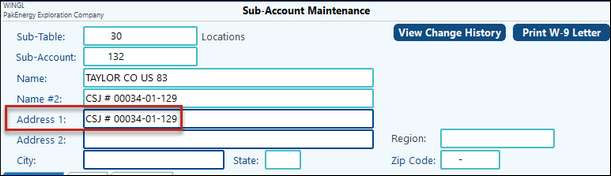
Setup: In Sub-Account Maintenance, for each Job Code, the project/job code (used to identify the job to the government) must be in Address Line 1. This is needed to populate the actual XLS file that is created. The Sub-Account code 132 is part of the file name for the customer to identify which of their job codes is in this file. The project code (numbers only) in Address line 1 shows up in the actual file field Project_code.
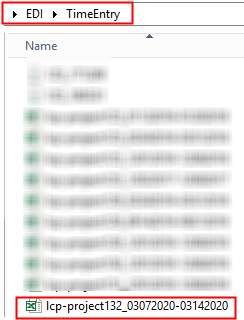
File Location: •LCP files are located in GLN32 – XXXXX (company code) – EDI – TimeEntry. •They will start with lcp-project - then Job Code number – then the pay dates.
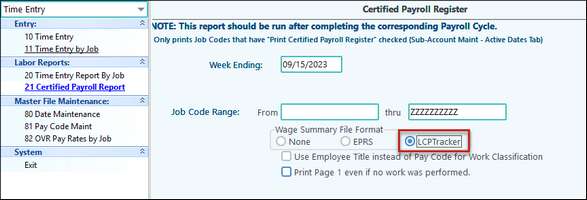
Use: 1.Go to the Time Entry module (in the drop down,) and click on # 21 Certified Payroll Report menu item. 2.Enter in the Week Ending date, making sure it matches the file name. 3.Enter in the Job Code Range (from the file name) in the From / thru fields. 4.Check the LCPTracker option in the Wage Summary File Format section.
|