Invoice Coding List
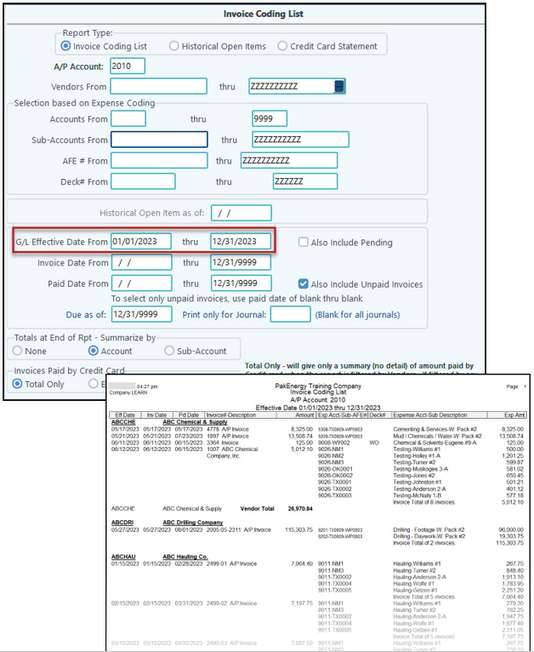
Provides a report to view paid or open A/P invoices filtered by account, date range for effective date, invoice date, AFE, and/or paid date. Check box to print the G/L account totals by Sub-Account. Print by Vendor, a list of the invoices and the associated expense coding for all payment types to include credit cards if desired. At the end of the report, a summary of all the expense coding is printed.
The report can be run on a historical open item basis or with several other options, including providing totals paid by credit card. One of the primary purposes of this report is to come up with a list of adjustments to adjust an accrual set of books to a cash basis.
The top section is your “who” or “what” and the bottom section is your “when”.
EXAMPLE 1: I only want to see invoices for 2023. Leave all the fields as the default but enter in the date range in the G/L Effective Date fields.
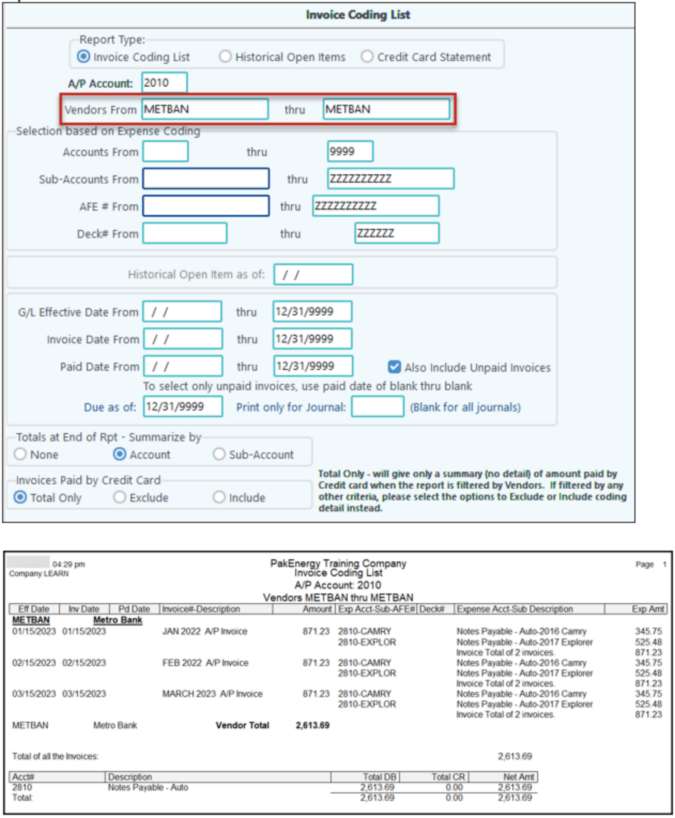
EXAMPLE 2: I want to see all invoices coded to a specific vendor. Leave all the fields as the default but enter in the Vendor fields. The date fields could also be used to further filter the report.
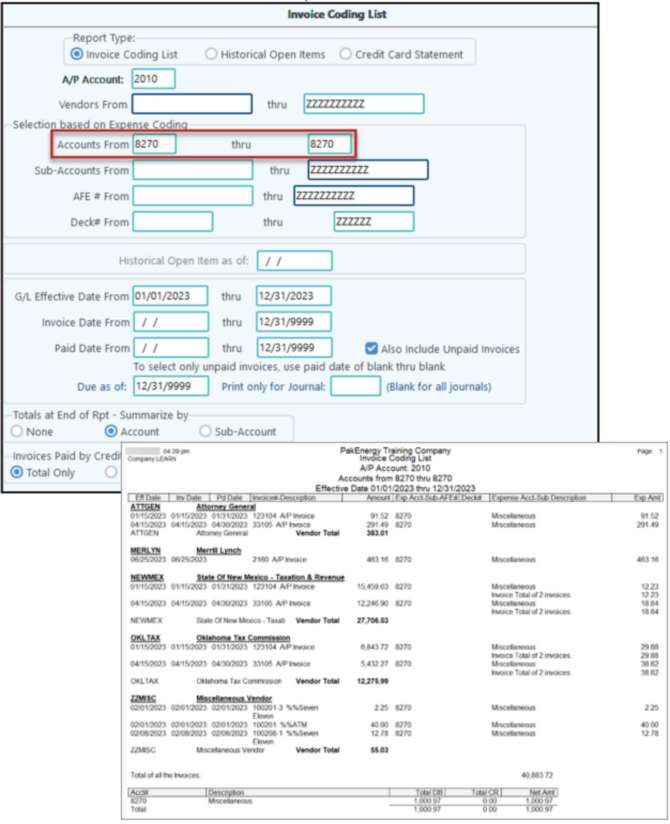
EXAMPLE 3: I want to see what was booked to a specific expense account. Leave all the fields as the default but enter in the Account fields in the Expense Coding section. The date fields could also be used to further filter the report.
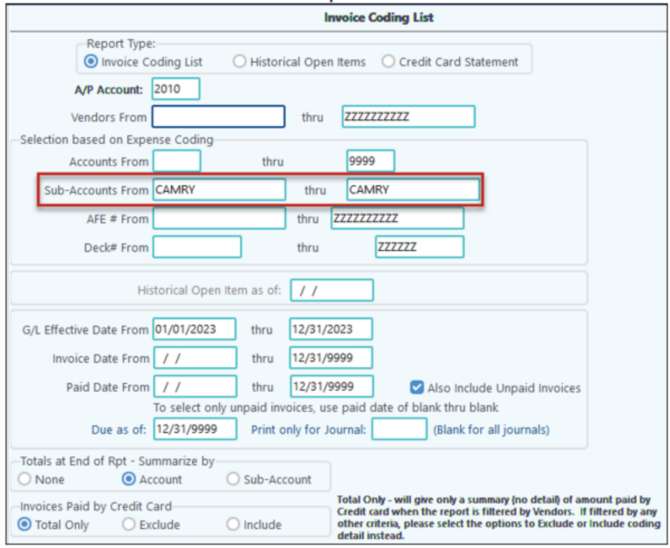
EXAMPLE 4: I want to see what I spent on a specific Sub-Account. Leave all the fields as the default but enter in the Sub-Account fields in the Expense Coding section. The date fields could also be used to further filter the report.
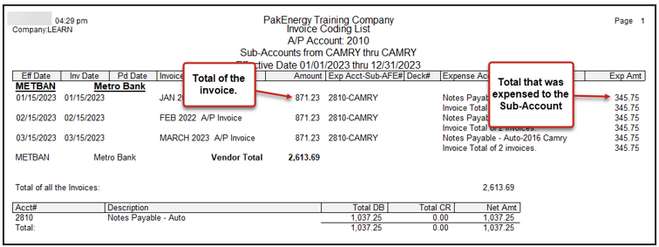
Please Note: If running by just account or Sub-Account, the total in the Amount column may be different than the Exp Amt column. This is because the first column will be the total for the invoice; it may contain other accounts or Sub-Accounts that are not part of our filter. The Exp Amt is just the amount that fits our filter. The amounts in the Exp Amt column are the amounts that will populate in the Account Summary at the end of our report.
|
Accrual Report with optional G/L Entries
Prints invoice expenses in Account, Sub-Account order. There is an option to create G/L entries to an Accrual Journal and account for the end of a period, with reversing entries for the start of the following period. This report can be summarized by account. Sub-Account, or property/AFE#. In addition, the invoice detail can be printed if the box is checked on the "Print Invoice Detail" option.
This report will not be seen unless you are authorized for Consolidation or Combination optional add-on modules. Contact you Customer Success Team for information on these options. This report will create reversing entries for A/P and/or A/R invoices that have not been paid as of the end of a selected year. The entries will be made into the combined company. Enter the end of the selected year (typically the last day of the year) for the reversing entries and the combined company code in their appropriate fields. Check the box to create A/P and/or A/R entries. Enter the account number for the A/P and/or A/R accounts for the current company. Enter the journal for the A/P and/or A/R accounts for the selected company. When all options are defined, click on the "OK" button at the bottom of the screen to create the entries.