Tax Warrants are legal levies against an owner on a specific property for revenue associated with that property. These legal documents are typically issued by a state or county but may be issued or authorized by the court for other tax entities when an owner fails to pay what is due (property taxes, income taxes, etc.). In the past, many people accomplished this task in a very manual and labor-intensive process via spreadsheets. In Pak Accounting, tax warrants are an easy one-time setup for the owner(s) involved.
This process includes creating a tax warrant for an owner, keeping the balance updated, and automatically making a payment to the tax entity through the revenue/billing cycle. A benefit of using the Tax Warrants feature in Pak Acounting is that the revenue used to pay the warrant carries through to that owner’s 1099 for tax purposes. Meaning you no longer need to manually maintain that revenue to add to the owner’s 1099 at the end of the year.
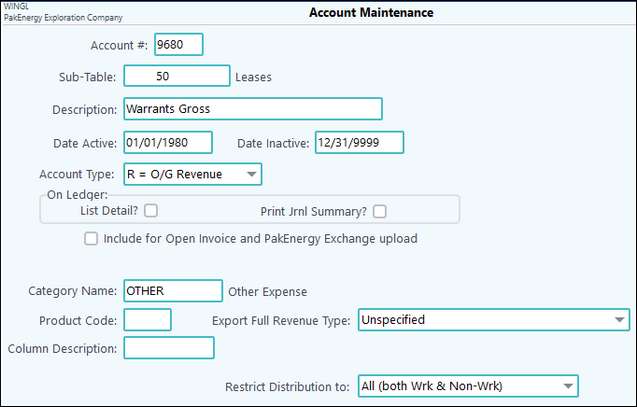
Setting up a tax warrant is simple. First, add a new General Ledger Account for the warrant entries. The account type should be set as “Revenue” with the category set to “Other” and a blank “Product” associated with the account. For example, account 9680 has been set up as a tax warrant account. It must include the property Sub-Table like other Revenue/Billing accounts.
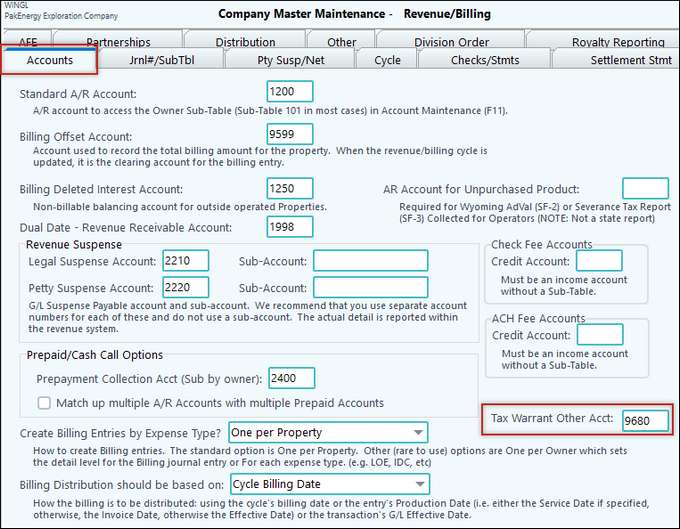
Once you add the account, you must also populate it on the Revenue/Billing > Company Maintenance > Company > Accounts Tab in the “Tax Warrant Other Acct:” field.
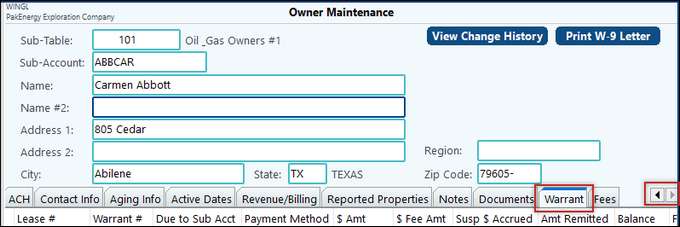
After completing the Company Maintenance step, a new tab on the Owner Maintenance screen (F12) labeled Warrant becomes accessible. You may need to scroll over to view all tabs.
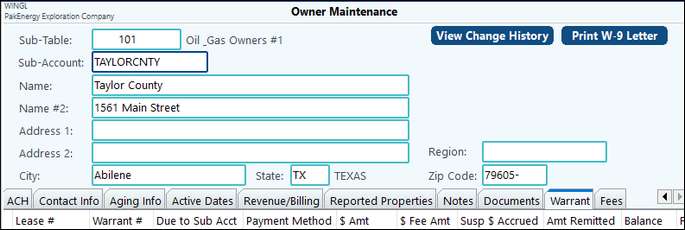
Next, create the taxing entity issuing the warrant as an owner in the owner Sub-Table. For example, Taylor County has been set up as an owner in this scenario.
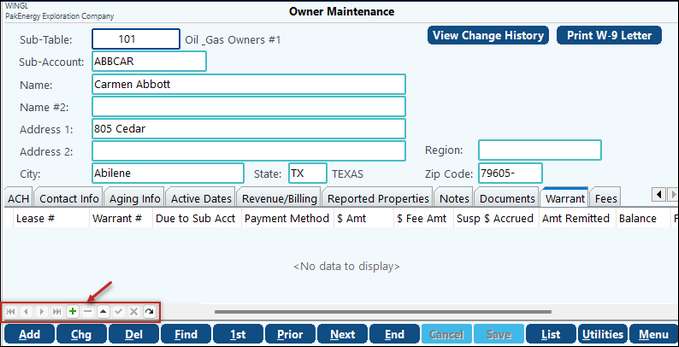
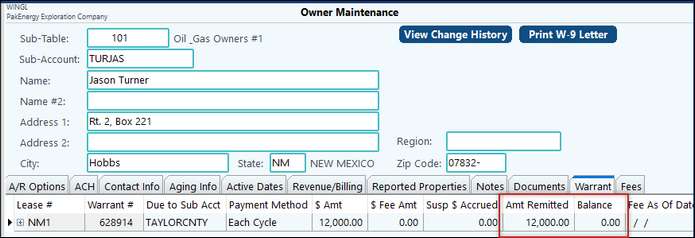
Now that the tax entities have been set up as owners, add warrants to interest owners whenever received. In the following screenshots below, we have established tax warrants for two owners. The first owner, Carmen Abbott, has one payment method option while the second owner, Jason Turner, has the other option to demonstrate how the different methods will process. To add a warrant to the owner, find the individual in Owner Maintenance (F12) and select the Warrant tab. Click on the green plus sign in the navigation bar in the bottom left corner of the screen.
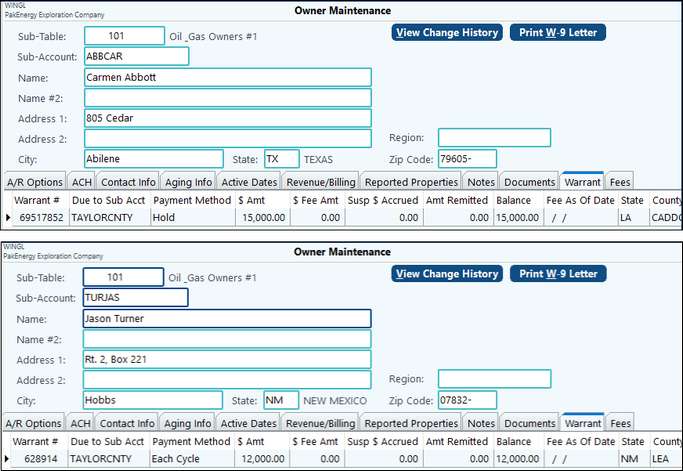
This will provide a line to enter the warrant information. Enter the Lease Sub-Account code attached to the warrant. The lookup button is available or simply type the Lease Sub-Account code. Type in the Warrant Number. This is usually located on the documentation received from the tax entity. Under the Due to Sub-Account field, enter the owner Sub-Account code set up for the tax entity. There are two Payment Method options to choose from. The warrant document will stipulate what type of payment to select. •Hold – This will allow the system to hold the money from the cycle until it collects the full amount due. Once the full amount owed is available, the Revenue/Billing cycle will generate a payment for the tax entity. •Each Cycle – The system generates a payment to the issuing tax entity each cycle until warrant paid in full. The payment comes from the revenue collected on the property during that cycle. Enter in the amount of the warrant in the $ Amt field. If any fees associated with the warrant are due, enter those in the $ Fee Amt field. You can add fees here at any time and those will add to the warrant balance. When fees are added, enter in the “Fee As Of Date”. If you add more fees later, update the date to the new “as of date”. The Susp $ Accrued field will populate when a revenue cycle processes. This holds the funds and updates the balance with each cycle. When the total funds due have been accumulated, payment is made to the tax entity. This only applies when the Payment Method is set to Hold. When the Payment Method is set to Each Cycle, the system writes a check to the tax entity during the cycle when the owner has revenue from this property. It updates the Amt Remitted field with the check amount written to the tax entity on the owner’s behalf and the reduces the Balance field by the payment amount. The State and County field automatically populate based on the Lease’s state and county located in the Property Maintenance form. If licensed for the Scanning module, you can scan documents into the Warrant document field. |
The Revenue/Billing Cycle with Warrants
Below are the screens for the two owners prior to a cycle.
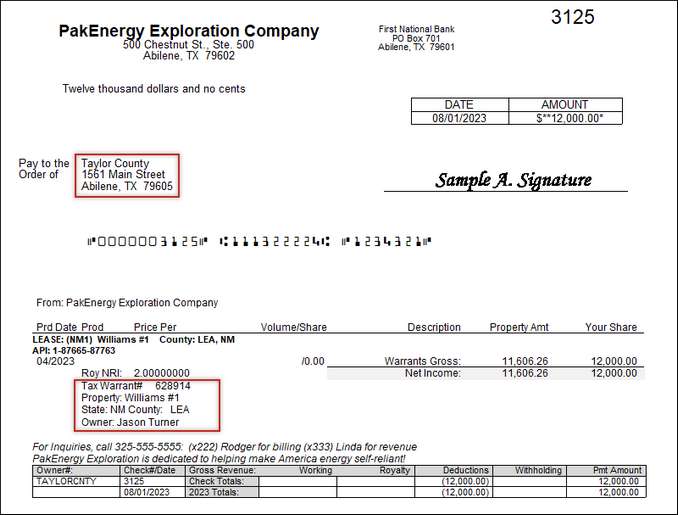
Once the Revenue cycle starts, the Write Checks process will create a check to the tax entity clearly identifies the Warrant being paid and includes the Lease, State, County and Owner’s name on the warrant remittance.
When there is sufficient revenue in the cycle along with any funds previously held back to pay the warrant, a check will be cut to the tax entity. The Amt Remitted does not change until the check is actually paid to the tax entity. For the owner who was set to pay each cycle, his Amt Remitted field is updated with the amount paid to the tax entity during the cycle and his Balance is reduced by the amount of that check.
Any revenue held until the total tax warrant amount is collected will have the suspense code of RTW (revenue tax warrants). When the system collects the total amount, the Revenue/Billing cycle will release these funds and write a check to the Sub-Account listed on the tax warrant.
|

In the Revenue/Billing Reports menu, you can find reports for Warrants on the Owner tab. The O-1 Summary by Check and the O-2 Summary by Distribution show the amount that would have paid to the owner Jason Turner and a deduction for the amount paid to the tax entity on the owner’s behalf. Since this payment is on the owner’s behalf, the system creates a check record for the owner to include it on their 1099.
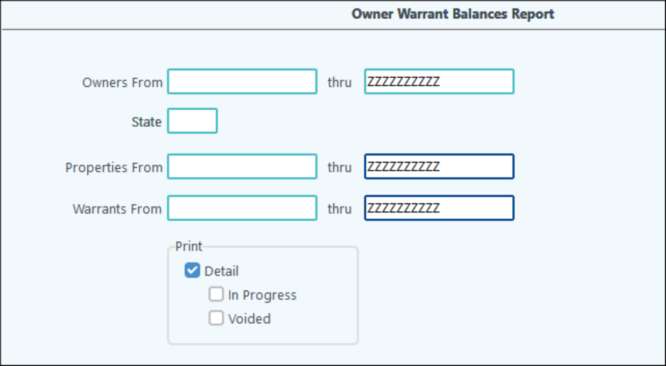
A new report O-25 Owner Warrant Balances Report has been added to the Owner Reports tab. It includes options to specify an owner range, State, a property range and Warrants range. Run the report without the Detail button checked to get general information about the
Run the same report with the detail box checked to get updated details included.
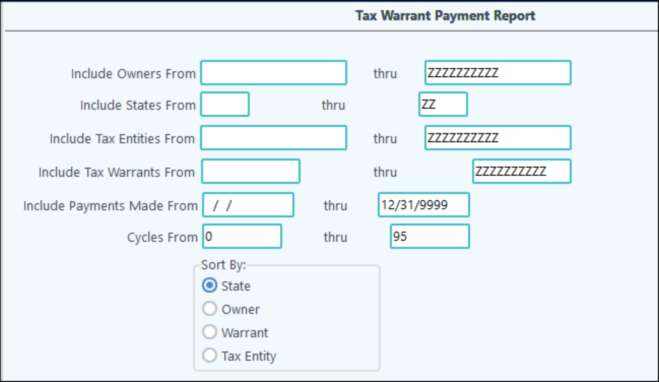
The O-26 Tax Warrant Payments Report will list tax warrant payments. You can filter this report by owner, state, tax entities, tax warrants, and payment dates. The option to sort by State, Owner, Warrant or Tax Entity also is available.
|